
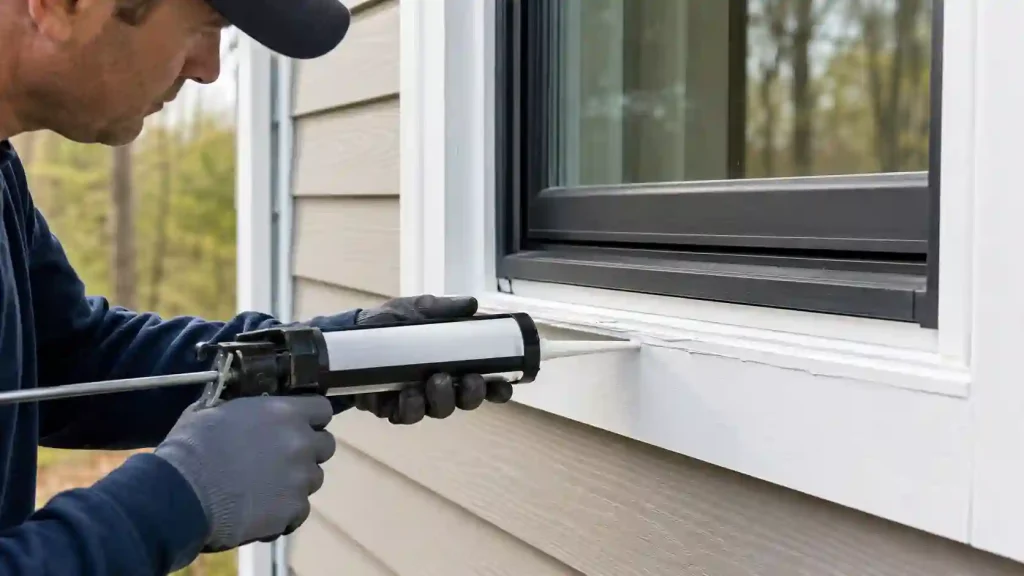
Quick answer: Remove any failed old caulk first, keep every weep hole and drainage opening clear, work only when conditions fall within your specific sealant’s stated application range, run a continuous bead along the fixed joints your window design calls for, then tool it smooth before it skins over. Caulk seals a fixed joint. It does not fix a window that is rotted, leaking through failed flashing, or missing weatherstripping elsewhere.
Caulking outside windows can meaningfully reduce air leakage and help prevent water intrusion through failed perimeter joints, but only when you’re sealing the right joint in the right way. You may have noticed a draft, a water stain below a sill, or an old caulk bead pulling away from the frame. Before you grab a tube and fill every gap you can find, it’s worth working through where caulk actually belongs, where it can make things worse, and what conditions actually let it cure the way it’s supposed to. If the old caulk is still there, our guide to removing old caulk covers getting it out cleanly before you start.
Is This a Caulking Problem, or Something Else?
Caulk seals a fixed joint. It doesn’t fix a moving part, and it’s not a substitute for the flashing and drainage built into the window and wall assembly behind it.
A few signs point to a different problem than a simple re-caulk: the frame itself feels soft or shows rot, the sash doesn’t seal properly when closed (that’s usually a weatherstripping or hardware issue, not a caulk issue), water keeps showing up in the same spot no matter how much you reseal it, or the gap exceeds what your sealant’s instructions call a normal joint, keeps widening over time, or shows movement between the surrounding materials. If any of that sounds familiar, it’s worth having someone look at the window itself before you spend another afternoon recaulking the same spot.
Where to Caulk Around a Window, and Where Never To
Where it generally belongs: the fixed joint where the window frame meets the exterior trim, and where that trim meets the siding. These are non-operable joints. They don’t open and close the way a sash does, but that doesn’t mean zero movement, the frame, trim, and siding still expand and contract with temperature. Many exterior sealants specify how much joint movement they’re designed to accommodate, which is part of what to check when you’re choosing one, more on that below. Exterior sealant supports this joint, it isn’t a substitute for head flashing, sill flashing, or whatever drainage path the window and wall assembly was actually designed with.
Where it should never go, and this is the mistake that causes the most damage down the line: weep holes and any other opening designed to let water drain back out of the window assembly. Sealing one shut restricts the drainage path it was designed to provide, and water that’s supposed to work its way back out during a storm has a harder time doing so. Over time, that’s what rots a sill or works its way into the wall. If you’re not sure whether something is a weep hole or just an odd-looking gap, check your window’s documentation or ask before you seal it, rather than assuming more sealant is always safer.
The other spot to leave alone is anywhere a sash or other part actually moves, where an operable window meets its frame, for instance. That joint needs to keep moving, and caulk there just gums up the mechanism. Weatherstripping, an existing gasket, or a hardware adjustment is normally the right fix for a moving joint, not sealant.
And if the gap you’re filling looks unusually wide or deep, don’t just keep adding caulk until it’s full. The real reason to add a backer rod first isn’t to save material, it’s to control how deep the bead sits, keep it from bonding to the back of the joint, and let it hold the right shape to flex with the joint’s movement instead of tearing. A rough visual cue some people use is a gap wider than about a quarter inch, but that’s a common rule of thumb, not a technical spec, check your sealant’s actual joint dimension guidance if you want a precise answer. Pack a compatible foam backer rod in first, then seal over it.
What Temperature Is Best for Exterior Window Caulking?
There’s no single temperature that applies to every exterior sealant, and checking your specific product’s label matters more than any range you might read elsewhere, including this one. That said, a range you’ll commonly see cited as a rough reference is somewhere around 40°F to 80°F, cold-weather-formulated sealants exist that are rated well below that, and the only way to know for certain is your product’s own label or technical data sheet.
A few things matter beyond whatever number is on the label:
- Surface temperature isn’t the same as air temperature. A dark metal frame in direct sun can run noticeably hotter than the air around it, and a frame in shade on a cool morning can still be cold even once the day has warmed up.
- Make sure the surface is free of frost or condensation, even a film that’s hard to see, before you apply anything. In cold conditions, let the surface and cartridge warm up as your product’s instructions recommend rather than working straight off a cold truck or a cold morning.
- Prepare the surface the way your specific product calls for. Most sealants want a clean, dry joint, but some all-weather formulations are built to tolerate a damp surface, check the label rather than assuming either way.
- Check the forecast, not just the current temperature. Rain before the sealant reaches its stated rain-ready time can damage the bead or interfere with adhesion and curing, not just wash it away outright.
- Store and condition the cartridge as the manufacturer recommends in cold weather. A cartridge that’s been sitting in a cold truck generally dispenses less evenly than one that’s been allowed to warm up first.
Caulk, Weatherstripping, Foam, or Flashing? Picking the Right Fix
Caulk gets used as the default fix for almost anything near a window, but it’s only the right tool for some of these jobs.
| Where the Problem Is | Better Fix |
| Small fixed joint, frame to trim or trim to siding | Exterior caulk |
| Moving joint, where a sash meets its frame | Weatherstripping or the existing gasket |
| Accessible air gap between the frame and the rough opening, typically addressed from the interior or during trim work | Manufacturer-approved low-expansion window and door foam, installed without blocking any drainage path |
| Water getting in behind the cladding or through the wall assembly | Flashing or installation repair, not another bead of sealant |
| Glass panel bedded into a wood or metal sash | Window glazing compound, a different material and job entirely |
If you keep resealing a spot and it keeps failing or leaking again, that’s usually a sign the actual problem is in one of the other rows on this list, not that you need more caulk.
Choosing a Caulk and a Gun for the Job
For the sealant itself, check that the product is labeled for exterior use and compatible with both materials you’re joining. Beyond that, it’s worth checking a few things most people skip past on the label: the permitted joint width and depth, the movement capability rating, paintability if that matters for the spot, rain-ready and full-cure time, and whether the surface needs to be dry or can tolerate some moisture. Silicone, polyurethane, and hybrid sealants all handle exterior movement and weather somewhat differently, but the right choice comes down to what’s actually on the label for your joint, not a blanket rule about which chemistry is “best.”
For the gun, two things matter more than most people expect. First, confirm the cartridge size, many retail window-and-door sealants are supplied in standard rigid cartridges, but it’s worth confirming the format before you assume any gun will fit. Second, match the gun’s thrust ratio, or mechanical advantage, to how much resistance the material actually gives you when you squeeze the trigger. Higher-viscosity sealants take more effort to dispense regardless of whether they’re silicone, polyurethane, acrylic, or hybrid, viscosity varies within any of those categories, not strictly between them, so it’s the actual resistance that matters, not the label’s chemistry name. That resistance also shifts with material temperature, nozzle opening, and how much cartridge is left, not just the product itself. A gun with a higher thrust ratio makes a thick sealant noticeably less tiring to work with, especially when you’re sealing more than one window. Our caulking gun options page covers what to look for if your current gun is struggling to keep up.
Once the gun and cartridge are sorted, our guide to cutting a caulk tip and guide to loading a caulking gun cover getting it ready to go.
How to Apply and Finish Exterior Window Caulk
Once the old caulk has been removed, the joint has been prepared, and any required backer rod is in place, follow these steps to apply and finish the new bead.
- Confirm you’re sealing the right joint: Double-check it’s the fixed perimeter joint you actually mean to seal, not a weep hole, drainage opening, or a spot where the sash moves, before the sealant is out of the tube and you’re committed.
- Run a continuous bead: Work the gun at a steady angle along the joint, aiming to push the sealant into the gap rather than just laying a strip on top of it, and move at a consistent pace rather than stopping and starting. If you’re working above ground level, use a stable platform or professional access equipment rather than reaching from an unsecured ladder.
- Tool it while it’s still workable: Press the bead into full contact with both sides of the joint within the product’s stated tooling window, rather than leaving it sitting unshaped on the surface. If you’re working with a silicone sealant specifically, our guide to using a caulk gun with silicone covers the technique in more detail. Other sealant chemistries may call for different tooling and cleanup methods.
- Protect it until it’s cured: Keep the fresh bead out of rain until it reaches the product’s stated rain-ready time. Do not paint or handle it until the stated paint-ready or handling time, and allow the full curing period before exposing the joint to normal service conditions.
A few mistakes are common enough to call out specifically:
| Mistake | What Happens | Fix |
| Caulking over old, failed caulk | New sealant may not bond reliably to loose or incompatible old material | Remove the old caulk completely first |
| Applying to a surface condition your product doesn’t allow | Poor adhesion, early failure | Check the label, most want clean and dry, some all-weather products tolerate damp |
| Cutting the tip too large | Thick, hard-to-control bead | Start with a smaller opening than you think you need |
| Leaving a gap between the bead and one side of the joint | Water gets behind the seal instead of being stopped by it | Tool the bead into full contact with both surfaces |
| Ignoring the joint’s depth and letting the bead bond to the back of the gap | Wrong bead geometry, wasted material, premature cracking | Use a backer rod, or bond-breaker tape where a rod can’t be installed |
| Working outside the temperature range on the label | Poor cure, weak adhesion, early failure | Check the label and wait for suitable conditions |
How Long Does Exterior Window Caulk Last?
There’s no single service-life figure that covers every exterior sealant. Durability depends on the formulation, how much the joint moves, sun exposure, surface prep, and climate. What’s more useful than a fixed year count is watching for the signs it’s due: cracking, a section pulled away from one side of the joint, or a bead that’s gone hard and brittle. Repeated failure in the same spot is less likely to be solved by adding more caulk, it may point to excessive joint movement, damaged trim, failed flashing, or another window installation issue worth having a professional look at.
Sealing the correct perimeter joint, keeping every drainage opening clear, and staying within your sealant’s stated limits for surface prep, temperature, and joint dimensions covers most of what determines whether a caulking job actually holds up. If you’re weighing manual, pneumatic, or cordless options for the job, our guide to types of caulking guns covers how to choose between them.
FAQs About Caulking Exterior Windows
What temperature is too cold to caulk outside?
There’s no single minimum that applies to every product, always check your specific sealant’s label or technical data sheet for its stated ambient and substrate temperature limits. A range you’ll often see cited as a general reference is somewhere above 40°F, though cold-weather formulations can be rated well below that.
Should you caulk the bottom of a window?
Do not seal weep holes or other designed drainage openings. Whether the rest of the bottom perimeter joint should be caulked depends on your specific window’s design, check the manufacturer’s installation instructions if you’re not sure.
Can you glaze a window with a caulk gun?
That’s a different job from exterior window caulking. Window glazing seals glass into a wood or metal sash rather than sealing the window’s outer perimeter. Some glazing compounds are packaged for a caulk gun and work well this way; traditional oil-based putty is applied with a putty knife instead. Either way, use a product specifically made for glazing, not standard exterior caulk.
Can you apply new caulk over failed window caulk?
Generally no. Failed, loose, or contaminated old caulk doesn’t give new sealant a reliable surface to bond to, and covering it over tends to lead to both layers failing together sooner than removing the old caulk and starting on a clean joint would.
Do you need a backer rod for caulking around a window?
Use one when the joint is deeper than your sealant’s instructions call for, or when you need it to avoid the bead bonding to the back of the gap. A quarter inch of width is a rough visual cue some people go by, but it’s not a technical threshold, the real driver is joint depth and geometry, not width alone.
Is a manual or cordless caulking gun better for sealing windows?
For a typical residential job, a manual gun with enough mechanical advantage for your sealant is usually all you need. A cordless gun becomes more worthwhile once you’re sealing enough windows in one session that trigger fatigue starts affecting your consistency, it reduces repeated hand effort and can help keep output steadier toward the end of a long run.