If you want to know how to use a caulk gun for silicone, this guide walks you through the basic process step by step. It explains how to load the cartridge, cut the nozzle, control sealant flow, and avoid common application mistakes when using a caulk gun with single-component silicone sealant.
What You Need Before Using a Caulk Gun for Silicone
Before you begin, gather the following items to ensure a smooth application:
Silicone sealant cartridge: standard size for single-component use
Compatible caulk gun: manual, pneumatic, or electric caulking gun, but designed for single-component cartridges
Cutting tool: utility knife or scissors for cutting the nozzle tip
Puncture tool if needed: many caulk guns have a built-in rod for piercing the inner seal
Cloth, gloves, and masking tape: for cleanup and achieving a neat bead if is required
Having everything ready before you start will help you work continuously and avoid interruptions that can compromise the finish.
Step 1: Check That the Silicone Cartridge Matches the Caulk Gun
Before loading the caulk gun, confirm the cartridge format and gun compatibility:
Check that the cartridge size matches the gun before loading.
Confirm the gun is made for standard single-component cartridge use.
Inspect the cartridge for damage, leakage, or deformation.
Do not force an incompatible cartridge into the frame.
Step 2: Cut the Nozzle to the Right Opening Size
The size of the caulk tube nozzle opening directly affects the bead width and how well you can control the silicone:
Cut the nozzle tip based on the bead width you need. A smaller nozzle size for silicone gives better control, while a larger opening increases output but may create uneven or messy bead lines.
Cut the nozzle at an angle if the application requires more directional bead placement.
Step 3: Puncture the Inner Seal if the Cartridge Requires It
Some silicone cartridges have an inner seal under the nozzle. If this seal is not punctured, no material will flow:
Use the puncture rod or proper tool from the caulk gun.
Do not use excessive force that may damage the cartridge opening.
Make sure sealant can flow freely before starting application.
Step 4: Load the Silicone Cartridge into the Caulk Gun Properly
Loading the silicone cartridge correctly helps keep it stable in the frame and allows more even pressure during application:
Release the plunger first.
Place the cartridge into the frame correctly.
Make sure the nozzle points in the right dispensing direction.
Seat the cartridge firmly so it does not shift during use.
Step 5: Start with Light Pressure and Test the Flow First
Do not begin on your actual workpiece. A quick test helps you dial in control and identify any issues:
Apply light trigger pressure first.
Test on scrap material or a non-critical area.
Make sure the silicone flows evenly.
Adjust hand pressure before moving to the final application line.
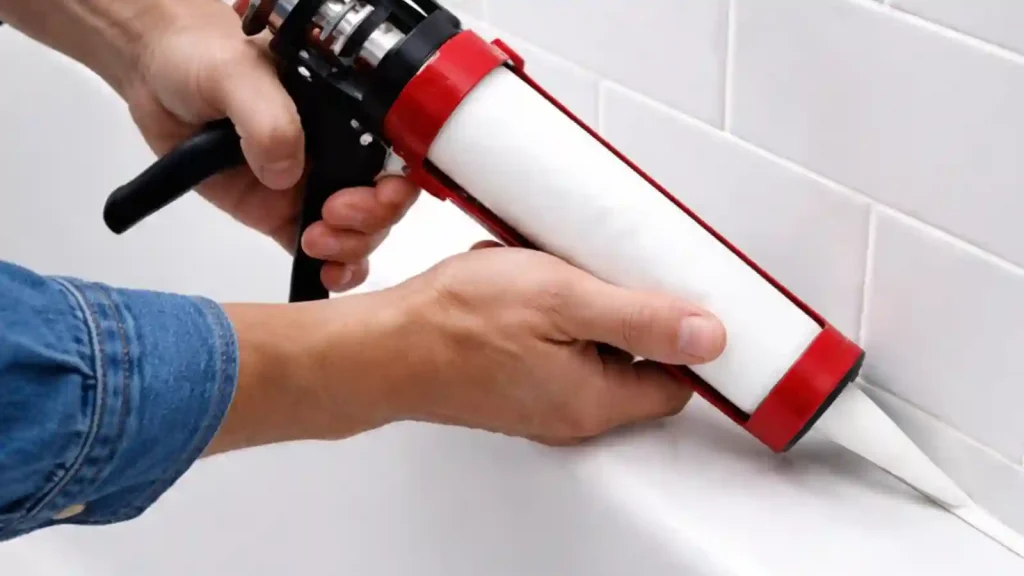
Step 6: Move the Caulk Gun at a Steady Speed for an Even Silicone Bead
This is nearly the most important parts of the process. The quality of your silicone bead depends on consistent movement, angle, and pressure.
Keep a Consistent Angle
Hold the gun at a 45-degree angle relative to the joint or surface. Changing the angle during application alters the bead shape and can cause uneven coverage.
Use Steady Trigger Pressure
Apply smooth, continuous pressure rather than squeezing in bursts. Jerky pressure creates a bead that varies in width and may leave gaps.
Match Your Movement Speed to the Output
The speed of your movement must match the rate at which silicone is being dispensed:
Moving too fast creates a thin, broken, or discontinuous bead.
Moving too slow causes material to pile up and overflow.
Avoid Stopping Too Often in the Middle of the Line
Each time you stop and restart, it introduces a potential weak point or visible seam. If you must stop, release pressure first and restart slightly behind the stop point for a smoother transition.
Step 7: Release Pressure Correctly to Prevent Dripping and Overrun
One of the most common frustrations when using a caulk gun is silicone continuing to flow after you stop squeezing, so you can:
Release pressure when the bead is complete.
Stop output before pulling the gun away.
Proper pressure release helps reduce extra flow and tailing.
Step 8: Finish and Smooth the Silicone Bead Before It Sets
Silicone begins to skin over within minutes, so finishing work should be done promptly:
Remove excess material quickly.
Smooth the bead only if the application requires it.
Keep the finish consistent along the joint or sealing line.
Do final wipe-down before silicone skins over.
Step 9: Handle the Cartridge Properly After Use
If you have leftover silicone, proper handling can help extend its usability and reduce material waste:
Stop pressure completely.
Store the partially used cartridge properly if reuse is possible.
Keep the nozzle area clean.
Avoid leaving excess silicone around the opening.
What are Common Mistakes of Using Caulk Guns for Silicone
Even with the right technique, small oversights can ruin a job. Avoid these frequent errors:
- Cutting the nozzle too wide: this can make the bead harder to control and lead to messy application.
- Using too much trigger pressure: excessive pressure can cause overflow and uneven bead size.
- Moving too fast or too slowly: incorrect movement speed can create broken lines or material buildup.
- Not testing the flow first: skipping a quick test can lead to poor control at the start of the actual application.
- Not releasing pressure after application: trapped pressure can cause dripping and extra material flow.
- Using the wrong caulk gun for the cartridge format: poor compatibility can affect fit, pressure control, and application quality.
When a Manual Caulk Gun Is Enough for Silicone and When a Pneumatic Gun May Work Better
For most small to medium silicone applications, a manual caulk gun provides sufficient control and is cost-effective. It works well for intermittent use and repairs.
For repetitive dispensing, high-volume jobs, or situations where consistent output pressure is critical, a pneumatic caulk gun may offer better results. Pneumatic models reduce hand fatigue and deliver more uniform flow across long bead runs.
If you are working with standard single-component silicone cartridges, a single-component caulking gun is the most direct starting point for reliable, consistent application.
FAQ About Using a Caulk Gun for Silicone
Can I use any caulk gun for silicone?
Not necessarily. The caulk gun must be compatible with the cartridge format. Standard single-component silicone cartridges require a gun designed for that size and type. Using an incompatible gun can result in poor fit, uneven pressure, and messy application.
How big should the nozzle opening be for silicone sealant?
Start with a small opening—just enough to create the bead width you need. For most applications, cutting the tip at a 45-degree angle and starting with a small opening gives you the best control. You can always enlarge it if more flow is required.
Why does silicone keep coming out after I release the trigger?
This usually happens because pressure is still trapped in the cartridge. After finishing your bead, release the trigger and pull back the plunger slightly or use the pressure release lever if your gun has one. This relieves residual pressure and stops excess flow.
How do you get a smoother silicone bead?
Consistent angle, steady trigger pressure, and even movement speed are the three keys. Cutting the nozzle to the correct size and testing flow on a scrap surface also help. Smooth the bead quickly before the silicone skins over for a cleaner finish.
Do you need a different caulk gun for thicker silicone materials?
Not necessarily. A standard single-component caulk gun can handle most silicone viscosities. However, for very thick materials or high-volume repetitive work, a pneumatic caulk gun can provide more consistent pressure and reduce hand strain.
Conclusion: The Key to Using a Caulk Gun for Silicone More Cleanly and Consistently
If you are using single-component silicone sealant, knowing how to use a caulk gun properly can make the difference between a clean, controlled seal and a messy, unreliable result.
The key steps of using a caulk gun are straightforward: confirm cartridge compatibility, cut the nozzle to the right size, puncture the inner seal, load the gun correctly, test flow first, and then apply with consistent angle, steady pressure, and even movement. Releasing pressure after each bead and handling the cartridge properly after use ensures you get the most from your materials.
For those applying silicone frequently or in higher volumes, a single-component caulking gun provides the reliable, consistent performance needed for professional-quality results.