
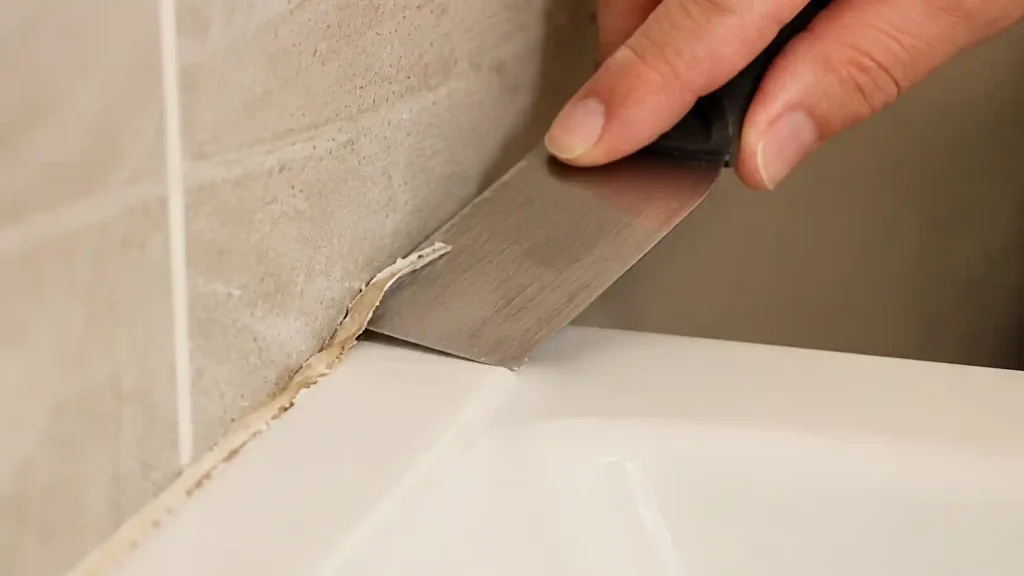
Quick answer: Score both edges of the old bead with a utility knife, soften it if it’s stubborn, then pry it out with a plastic or metal scraper depending on how delicate the surface is. Clear the leftover film with a solvent matched to the caulk type, let the joint dry completely, and you’re ready for a new bead.
Why You Can’t Just Caulk Over Old Caulk
It’s tempting to just run a fresh bead right over the old one and call it done. It won’t hold. New caulk needs to bond directly to the surface underneath, not to a layer of cracked, discolored, or partially failed material, and caulk doesn’t stick reliably to itself once it’s cured. Cover it up instead of removing it, and you’ll usually get peeling, gaps, or a new bead that fails within months instead of years.
If the old caulk is cracking, pulling away at the edges, discolored in a way cleaning won’t fix, or feels soft and spongy when you press it, that’s your sign it’s time to take it out rather than clean around it.
What You’ll Need
- A sharp utility knife, for scoring both edges of the bead and breaking its bond to the surface
- A putty knife or dedicated caulk removal tool, for prying and scraping once it’s scored. Metal gives you more leverage on stubborn, hardened caulk; plastic is the safer choice on anything that scratches easily
- A caulk softening product, optional but useful on old, hardened beads, these are sometimes sold as a silicone caulk remover and work by weakening the caulk from the inside so it lifts more easily
- Isopropyl alcohol or mineral spirits, for wiping away the residue film once the bulk of the caulk is out
- Gloves and eye protection, since flying bits of hardened caulk and any solvent you’re using both warrant a bit of caution
Before you use any solvent, remover, or softening product across a whole joint, test it on a small hidden area first, especially on painted trim, stained wood, plastic, or coated surfaces. Some of these products can dull, discolor, or soften finishes you didn’t mean to touch.
How to Remove Caulk: Step-by-Step
Step 1. Clean the area first
Wipe away any soap scum, dust, or grime sitting on top of the old caulk line. It sounds like an unnecessary extra step, but it’s hard to see exactly where the caulk starts and ends, or judge how bad the damage really is, when it’s covered in buildup.
Step 2. Protect what’s around it
Run a strip of painter’s tape along both sides of the caulk line if the surrounding surface scratches or stains easily. It takes an extra minute and saves you from an accidental slip with the blade.
Step 3. Score both edges
Run your utility knife along both sides of the bead, where it meets each surface. This breaks the bond and gives your scraper somewhere to get underneath.
Step 4. Soften it if it’s not budging
Old, fully cured caulk can be stubborn. If a caulk remover product is part of your kit, apply it now and let it sit for the time listed on the label, this can range from a few minutes to considerably longer depending on the product and how far gone the caulk is, before trying to scrape again.
Step 5. Strip it out
Work your scraper or putty knife under the scored edge and pull it away in strips where you can, rather than picking at it in tiny pieces. Go slow near anything you’re not sure will hold up to metal, and switch to a plastic scraper if you feel any resistance from the surface itself rather than the caulk.
Step 6. Clear the residue
Once the bulk of the material is out, there’s almost always a thin film left behind. Leave it, and your new caulk won’t bond properly to that spot. The next section covers how to deal with that film without damaging whatever’s underneath it.
Removing Caulk Without a Scraper
No putty knife on hand? A few things work in a pinch:
- A rigid plastic card (an old gift card or similar) run along the same scored edge, using the same motion a plastic scraper would
- Dental floss or fishing line, worked in a sawing motion right underneath the bead, useful for thin, flexible caulk that a blade tends to skip over
- A wooden craft stick or paint stir stick, shaved to a thin edge, if you need something softer than metal or hard plastic
- A hair dryer, held a few inches back, to warm and soften some beads before peeling them away by hand. A heat gun can do the same job faster, but use it with real caution, low setting, keep it moving, and never linger in one spot, since too much heat can warp, discolor, or damage paint, plastic, vinyl, or other nearby finishes
None of these move as fast as a proper scraper, but they’ll get you through a small job or a delicate surface without needing a specialty tool.
Cleaning Up Leftover Residue
The leftover film is usually the part people skip, and it’s also usually why a new bead fails early. Silicone in particular leaves behind an oily residue that new caulk, silicone or otherwise, won’t grip well.
Match your solvent to what you removed: isopropyl alcohol works well on latex or acrylic residue, while mineral spirits or a dedicated silicone remover cuts through the oily film silicone leaves behind. As with any solvent on this list, test it on a hidden spot first if you’re working near a painted, plastic, or finished surface. Wipe with a cloth rather than a paper towel where you can, since paper towels tend to leave fibers behind in a still-damp joint. If you notice any dark spots or mildew once the caulk is gone, clean that separately before moving on, sealing over it won’t stop it, it’ll just hide it for a while.
A Quick Note on Different Surfaces
Most surfaces respond to the same basic method, but a few call for a little more caution:
| Surface | What to Watch For |
| Painted wall or trim | Score lightly, a deep cut into the caulk line can nick the paint underneath it |
| Unfinished or stained wood | Test any solvent on a hidden spot first, some can lift stain or leave a mark |
| Brick or masonry | Caulk tends to grip more into the texture, so expect to spend more time on residue than on the actual stripping |
| Painted metal trim | Use a plastic scraper where possible, metal-on-metal contact scratches easily |
Tubs, showers, glass, and window frames have their own specific handling, from mold treatment to scratch-free technique, and should be handled with more surface-specific caution.
How Long to Wait Before Applying New Caulk
Once the joint is clean and residue-free, let it dry completely before loading up a fresh bead. On non-porous surfaces like tile, metal, or painted trim, a few hours is usually enough. On porous surfaces, unfinished wood or grout, for example, give it closer to a full 24 hours so any moisture from cleaning has a chance to fully evaporate. Caulking over a joint that’s still damp is one of the more common reasons a new bead fails to bond properly.
Ready to Re-Caulk? Here’s What Comes Next
Once the old caulk is out, the surface is clean, and it’s had time to dry, you’re ready to load a new bead. A few things to have sorted before you start:
👉 If you’re deciding what kind of gun to use for the job, take a look at our caulking gun options for applying a clean new bead.
👉 Loading the cartridge correctly, covered in our guide to loading a caulking gun.
👉 Cutting the tip to the right size and angle for the joint you’re filling, our guide to cutting a caulk tip.
👉 Applying a clean, consistent bead, our guide to using a caulk gun with silicone walks through technique.
FAQs About Removing Old Caulk
How do you remove old caulk?
Score both edges of the bead with a utility knife, soften it with a caulk remover if it’s stubborn, then pry it out with a scraper or putty knife. Clean up the leftover residue with a solvent matched to the caulk type before applying anything new.
What’s the best way to remove caulk without damaging the surface?
Start with the gentlest option that could work, a plastic scraper rather than metal, and go slow near anything delicate. Score the edges first rather than digging straight in, protect the surrounding area with painter’s tape if you’re working near something that scratches or stains easily, and test any solvent on a hidden spot before using it more broadly.
How do you remove caulk without a scraper?
A rigid plastic card, dental floss worked in a sawing motion under the bead, or a hair dryer to soften it before peeling by hand can all work for a small job. None are as fast as a proper scraper, but they’ll get a small area done without a specialty tool.
What removes silicone caulk residue?
A dedicated silicone remover or mineral spirits typically works better than plain soap and water on the oily film silicone leaves behind. Fully cured silicone usually needs some careful mechanical removal first, scraping or peeling, before a solvent can finish the job on what’s left. Test any solvent on a hidden area first, especially on painted, plastic, or finished surfaces.
How do you know it’s time to remove old caulk instead of cleaning it?
If it’s cracked, pulling away from either surface, discolored in a way cleaning won’t fix, or feels soft and spongy when pressed, cleaning over it won’t solve the underlying problem. At that point, full removal is the only real fix.
How long should you wait before applying new caulk?
A few hours is usually enough on non-porous surfaces like tile or painted trim. On porous surfaces like unfinished wood or grout, wait closer to 24 hours so any moisture has fully evaporated before you seal over it. If the joint still feels damp or smells strongly of solvent, give it more time before applying the new bead.
Does vinegar remove silicone caulk?
Not reliably. Vinegar is a common home-remedy suggestion, but cured silicone resists weak acids like vinegar fairly well. A dedicated silicone remover or an appropriate solvent is usually more effective, especially after the bulk of the caulk has been cut or peeled away.