Many dispensing defects look like material or equipment problems at first. You may see clogging, stringing, dripping, or an uneven bead and assume the pressure, viscosity, or machine setup is wrong. In practice, the tip itself is often the first place to check.
This article focuses only on dispensing tip mistakes and tip-related troubleshooting. It does not cover full process setup. At the end, you will also find a Quick Checklist to help you decide whether the defect comes from the tip or from broader process parameters.
For a broader overview of dispensing tip types, materials, and industrial applications, see our dispensing tips product page.
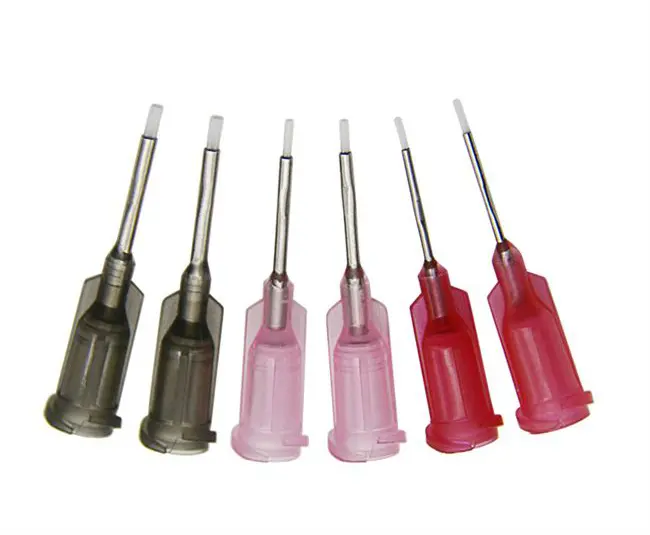
Mistake 1: Choosing the Wrong Gauge or Tip Length
Gauge and length are the two most fundamental tip parameters. Getting either wrong creates problems that can easily be misattributed to pressure settings or material viscosity.
Common Symptoms
- Bead consistently too wide or too narrow at stable pressure
- Frequent clogging despite correct material viscosity
- Flow pulses or surges inconsistently
- Tailing or stringing on tip lift-off
- Significant pressure drop across a long needle resulting in reduced output
Likely Causes
- Inner diameter too small for the fluid viscosity: forces the material through a restriction, causing pressure spikes, pulsing, and accelerated clogging.
- Gauge too large: reduces control and produces an oversized bead, especially with low-viscosity fluids.
- Needle too long: creates resistance across the cannula length, increasing back-pressure and making flow rate harder to control.
Corrective Action
Before adjusting dispense pressure, first test a larger ID (one to two gauge sizes up) if clogging or pulsing is the symptom. If the bead is oversized, step down in gauge. If pressure drop is the issue, switch to a shorter tip with equivalent ID. Always match gauge selection to the material’s published viscosity range, not to the desired bead size alone.
If you need a more structured method for matching gauge, length, and material viscosity, see our Dispensing Needle Selection Guide.

Mistake 2: Allowing Residue to Build Up Inside the Tip
Residue accumulation inside the cannula is one of the most common causes of gradual flow degradation. It is easy to overlook because the symptom — reduced or inconsistent flow — often appears slowly over multiple production cycles.
Common Symptoms
- Flow rate gradually decreases at constant pressure
- Bead diameter narrows or becomes uneven without a process change
- Partial clog that clears briefly when pressure is increased, then returns
- Contamination visible in the dispensed material
How to Distinguish from a Tip Size Problem
If the symptom appeared gradually and was not present at the start of the production run, residue buildup is the more likely cause. If the symptom was present from the first cycle, review tip gauge and material viscosity first.
Corrective Action
- One-time tips: replace after each production cycle or material change. Do not reuse disposable tips.
- Reusable metal tips: flush with an appropriate solvent immediately after each production pause — do not wait for the material to cure inside the cannula.
- Fast-curing materials (UV adhesives, cyanoacrylates, two-part epoxies): treat any pause longer than the material’s working time as a flush trigger, not just end-of-shift.
- Cap idle syringes: use tip caps to prevent partial curing at the orifice during short pauses.If cleaning does not restore consistent flow, replace the tip. Once material has partially cured inside the cannula, flushing often does not restore stable flow reliably; replacement is usually the safer choice.
If cleaning does not restore consistent flow, replace the tip. Once material has partially cured inside the cannula, flushing often does not restore stable flow reliably; replacement is usually the safer choice.
Mistake 3: Incorrect Tip-to-Surface Distance or Angle
Stand-off distance (the gap between the tip orifice and the substrate) and tip angle are often treated as fixed machine settings. In practice, they need to be verified whenever a tip is changed, a substrate thickness varies, or a new product is introduced.
Common Symptoms
- Bead width changes even though pressure and material are stable
- Material pools or smears at the start of a dispense path
- Inconsistent coverage — thick in some areas, thin in others
- Poor bead placement, incomplete wet-out, or inconsistent bond-line coverage
How to Distinguish from a Tip Size Problem
If bead width varies along the dispense path rather than being consistently wrong from the first shot, examine stand-off distance and angle before changing tip size. A tip-size problem produces a consistently wrong bead from the start.
Corrective Action
- Stand-off too small: the tip makes contact with or drags through the material, causing smearing and inconsistent bead height. Increase the gap.
- Stand-off too large: the material jet spreads before reaching the substrate, producing a wider, thinner bead with inconsistent edge definition. Decrease the gap.
- Wrong angle: for applications designed for perpendicular dispensing, even a small unintended tilt can displace the bead laterally and reduce placement consistency on narrow bond lines. Verify that the programmed or manual angle matches the application requirement, rather than assuming perpendicular setup is always correct.
If bead width is changing but pressure and material remain constant, check stand-off distance before assuming the tip is the wrong size.
Mistake 4: Using a Tip Beyond Its Reliable Service Life
Tip wear is a gradual process, you often notice bead drift or worse cut-off before you can actually see damage on the cannula.
Common Symptoms
- Bead width drifts at stable pressure (gradually widens or narrows over multiple cycles)
- Cut-off quality deteriorates — the bead tails or strings more at lift-off than it did earlier in the run
- Stringing increases progressively across a production shift
- Hub or cannula shows bending, burring, or residue that can’t be removed by flushing
How to Distinguish from a Clogging Problem
Clogging tends to cause a sudden, pronounced drop in flow. Wear-related drift is gradual and often not caught until bead quality has already moved outside tolerance. If the symptom developed slowly over many cycles, wear is more likely than clogging.
Corrective Action
- Establish a replacement interval based on cycle count, not only visual inspection. With abrasive or fast-curing materials, the interval will be shorter.
- Do not rely on visible aperture widening alone as a wear indicator. Monitor bead width data over production cycles.
- Replace immediately if the cut-off becomes ragged, stringing increases, or the cannula shows any physical deformation.
Mistake 5: Using a Tip Material Incompatible with the Fluid
Material incompatibility between the tip and the dispensed fluid can cause failures that are difficult to diagnose because the symptoms resemble clogging, contamination, or viscosity problems.
Common Symptoms
- Premature curing or hardening inside the tip
- Discoloration or particulate contamination in the dispensed material
- Accelerated corrosion or degradation of the cannula
- Scratch marks or surface damage on sensitive substrates
How to Identify a Compatibility Problem
If clogging occurs unusually quickly after startup, despite correct gauge and tip length, review material compatibility before treating it as a simple sizing issue.
Corrective Action
- Metal tips with reactive fluids: some reactive fluids may cure faster or behave unpredictably when they contact certain metals. If the same material repeatedly clogs one tip material much faster than another under similar conditions, compatibility should be reviewed.
- Metal tips on scratch-sensitive surfaces: even brief contact between a rigid metal orifice and a coated or polished substrate can cause surface damage. Evaluate softer tip materials for these applications.
- Plastic tips with aggressive solvents: verify chemical compatibility between the plastic and the solvent carrier before use. Incompatible materials can soften, swell, or leach contaminants.
If clogging recurs unusually quickly despite correct gauge and tip length, review the fluid’s compatibility with the tip material before increasing pressure or changing to another size.
Mistake 6: Ignoring Hub and Equipment Connection Compatibility
A tip that fits loosely or seals poorly introduces failure modes — air ingestion, pressure instability, material leakage — that are easy to confuse with pump or syringe problems.
Common Symptoms
- Material leakage at the hub or connection point
- Intermittent flow caused by air drawn into the system
- Tip loosening or rotating during automated cycles
- Unstable bead caused by intermittent loss of seal.
How to Distinguish from a Pressure Problem
If the symptom is intermittent and varies with cycle frequency rather than with material viscosity or pressure level, check the tip connection first. Pressure-related problems tend to be more consistent across cycles.
Corrective Action
- Verify the connection standard: confirm whether the tip uses Luer lock or Luer slip, and match it to the syringe or dispenser fitting exactly. Mixing standards causes partial engagement and poor sealing.
- Check hub material compatibility: the hub material must be compatible with the dispensed fluid, not just the cannula.
- Check rated operating pressure: a tip rated for low-pressure manual dispensing will not seal reliably in a pressurized automated system.
- Inspect the connection before each shift: tip threads and hub seats can deform over repeated cycles. A tip that seated correctly initially may develop play after extended use.
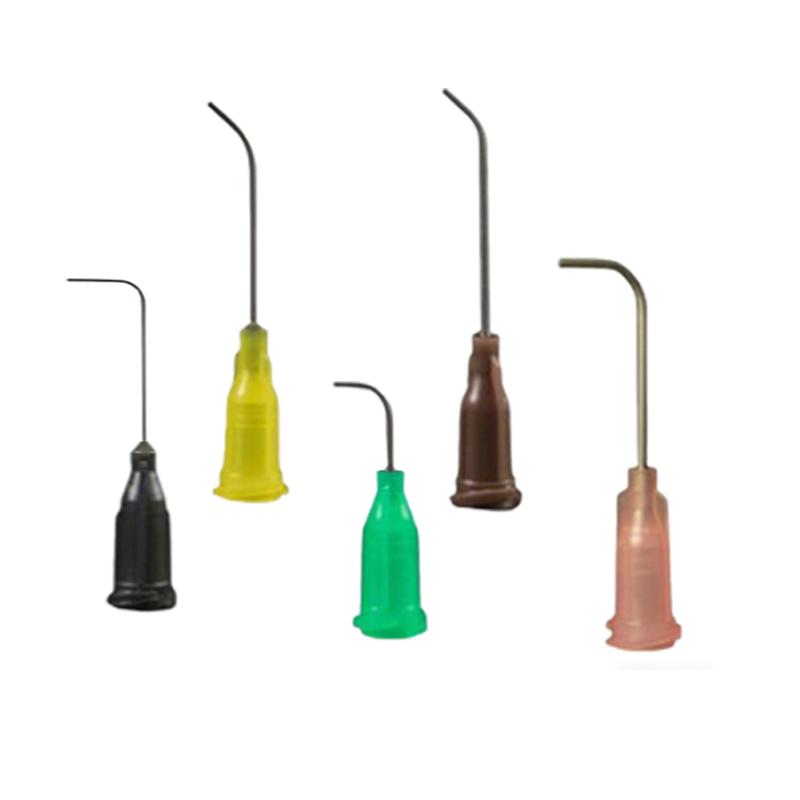
Mistake 7: Using a Tip Geometry That Does Not Match the Dispensing Path
Tip geometry affects whether the material reaches the target area cleanly and whether the dispensing path can be completed without obstruction. A geometry mismatch causes defects that look like a flow problem but are actually a physical access or bead-shaping issue.
Common Symptoms
- Tip contacts surrounding structures before completing the dispense path
- Bead quality is good on straight runs but degrades at corners or in narrow channels
- Material misses the intended bond line on recessed or angled features
- Stringing or dripping on the approach to confined areas due to excessive tip length
Corrective Action
- If the defect appears only on corners, recesses, or confined features, the problem may be access geometry rather than flow instability. In that case, changing pressure or gauge first usually does not solve the real issue.
- Review whether the tip can reach the target area cleanly without contacting nearby walls or dragging through the path. Geometry matters most when the dispense path is narrow, recessed, angled, or interrupted by surrounding structures.
If the symptom is specific to a particular feature or path segment and does not occur on straight, open-surface runs, review tip geometry before changing gauge or pressure.
Mistake 8: Storing Tips Improperly Between Runs
Tips that were performing correctly when last used can exhibit clogging, contamination, or flow irregularities at the start of the next production run if they were not stored properly. This is a common source of unexplained “first-shot” defects.
Common Symptoms
- First shot of a production run is clogged or inconsistent, even with a tip that was clean when removed
- Material from a previous cycle is found partially cured at the orifice
- Contamination (dust, particles) found inside the tip at inspection
- Metal cannula shows oxidation or surface discoloration
Corrective Action
- Cap tips as soon as they are removed from service, including short pauses, to reduce contamination and partial cure at the orifice.
- Store used and new tips separately. A partially cured or contaminated used tip should never be returned to the same container as clean stock.
- Before reinstalling a stored tip, inspect the orifice and cannula for residue, contamination, corrosion, or partial cure.If first-shot defects recur and typically disappear after replacing the stored tip, review capping, storage exposure, and handling conditions before changing pressure or material settings.
If first-shot defects recur and typically disappear after replacing the stored tip, review capping, storage exposure, and handling conditions before changing pressure or material settings.
Mistake 9: Increasing Pressure First When the Problem Is in the Tip
A very common troubleshooting error — and one that can mask the real cause, waste material, and damage equipment — is responding to flow reduction by increasing dispense pressure before verifying that the tip itself is the source of the problem.
Common Symptoms
- Flow problem “solved” by increasing pressure, but clogging recurs quickly
- Bead quality improves briefly after a pressure increase, then degrades again
- Equipment or syringe shows elevated pressure readings without a corresponding increase in flow
- Material bleeds from the hub connection after pressure is increased
Why This Matters
Forcing material through a partially clogged or worn tip by raising pressure accelerates cannula wear, risks hub seal failure, and can cause sudden material ejection if the partial clog clears under excess pressure. It also makes it harder to distinguish whether the root cause was in the tip or in the process parameters.
Corrective ActionBefore adjusting pressure, work through this sequence:
(1) inspect the orifice visually; (2) check for material buildup in the cannula; (3) verify the tip gauge matches the material viscosity; (4) check the hub connection seal; (5) confirm stand-off distance. Only after these checks are clear should pressure be adjusted as the variable.
Mistake 10: Not Separating Tip Problems from Process Problems
The hardest troubleshooting errors to resolve are the ones where the tip and process parameters are both being changed simultaneously. Without a structured approach, it is easy to spend significant time adjusting pressure, temperature, or material without recognizing that the root cause was the tip all along.
Key Diagnostic Principle
A tip-related problem often appears with a specific tip, develops gradually during a run, or disappears after the tip is replaced. A broader process problem usually remains even after a confirmed-good tip is installed.
Corrective Action
- Isolate the variable: if replacing the tip resolves the symptom, the cause was tip-related. If the same symptom appears immediately with a new tip, investigate process parameters.
- Change one variable at a time: do not change tip gauge and pressure simultaneously. Change the tip first, verify, then adjust pressure only if needed.
- Keep a run log: record tip type, gauge, material batch, pressure, and bead quality per cycle. Trends in the data will distinguish drift (tip wear or residue) from step changes (process parameter shift).
Tip vs. Process: Quick Troubleshooting Checklist
Use this checklist before changing any process parameter. Work through each area in order, starting with tip-side causes, and stop when the root cause is identified.
Step 1 — Check the Tip First
Start with the tip-side variables first. In many cases, you can isolate the problem here without retuning the full process.
| Gauge / ID | Does the inner diameter match the material’s viscosity? Is the tip too long, causing resistance? |
| Orifice condition | Is the orifice clear? Any residue, partial cure, or visible deformation? |
| Cannula wear | Has bead width drifted since the tip was installed? Does stringing increase over the run? |
| Tip material | Is the tip material compatible with the fluid? Any rapid curing inside the tip? |
| Hub connection | Is the connection fully engaged? Any leakage, looseness, or intermittent air ingestion? |
| Geometry | Does the tip geometry allow full path access? Any obstruction on confined features? |
| Storage condition | Was the tip capped and stored correctly? Any oxidation, contamination, or orifice partial cure? |
Step 2 — Check Stand-Off and Angle
| Stand-off distance | Is the tip-to-substrate gap consistent and within the recommended range? |
| Tip angle | Does the actual tip angle match the application requirement, rather than simply the assumed machine position? |
| Path variation | Does bead quality vary along the path rather than being consistently wrong? |
Step 3 — Only Then Check Process Parameters
| Pressure | Is dispense pressure within the normal range for this material and tip combination? |
| Material viscosity | Is the material at the correct temperature and within its working life? |
| Cycle timing | Are dispense time, back-suck, and dwell settings unchanged from the last verified run? |
| Material batch | Has the material batch changed? Does the same symptom occur with a confirmed-good tip? |
Conclusion
In day-to-day production, many dispensing defects are easier to solve than they first appear. If you check the tip systematically before changing pressure or reworking the process, you can usually narrow the cause much faster.
A wrong gauge, residue inside the cannula, poor connection, geometry mismatch, wear, or bad storage can all create defects that look like machine or material problems. Replacing the tip with a confirmed-correct one is often the fastest way to tell whether you are dealing with a tip issue or a broader process issue.
If the problem turns out to be tip design, size, or material selection rather than handling, you can then move to the next step and review the suitable dispensing tip options for your application.