
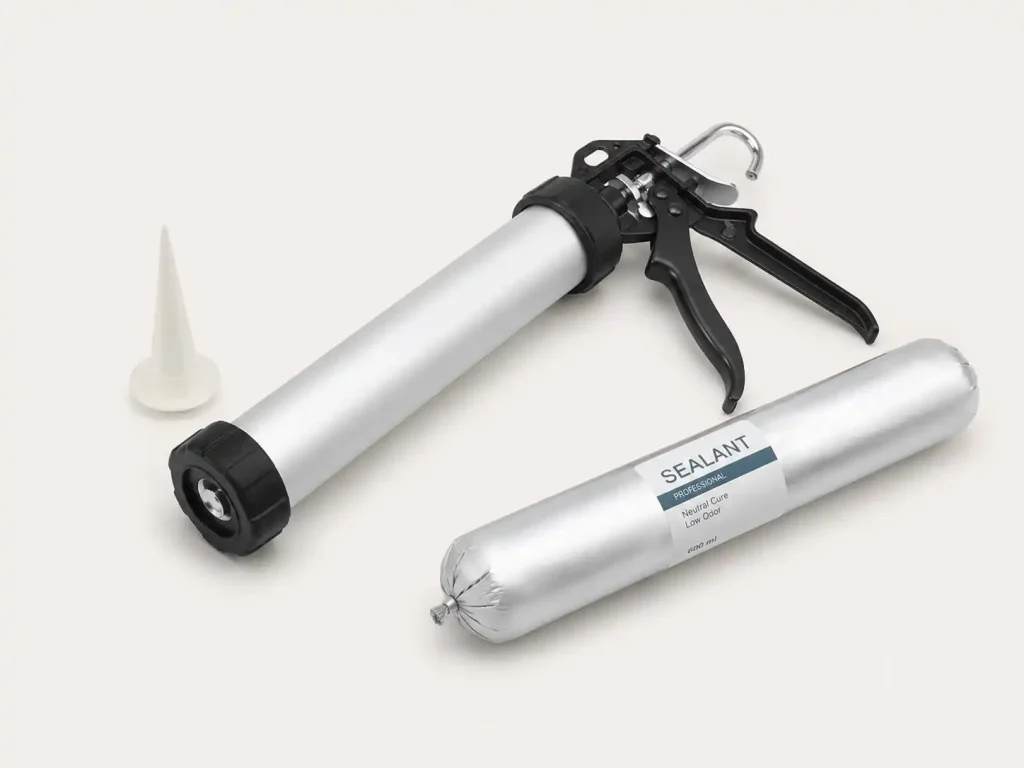
Quick answer: Unscrew the front cap, retract the plunger rod, load the sausage pack into the barrel, fit the nozzle over the cut opening, and tighten the cap back down before priming the gun. It’s a different sequence from a standard cartridge gun, since the barrel is fully enclosed rather than an open cradle.
Why Loading a Sausage Gun Is a Different Process
A sausage caulking gun looks like a bigger, heavier version of a standard cartridge gun, but the loading sequence isn’t just a scaled-up version of the same steps. A cartridge sits in an open frame, front cradle at the tip, exposed plunger plate at the back. A sausage pack sits inside a fully enclosed cylindrical barrel, held in place on both ends by parts you actually have to open and close. That’s the part that trips people up the first time: there’s a cap to remove, an internal plunger to retract, and a nozzle to fit and secure, all before you’re ready to prime the gun.
If you’re used to loading a standard cartridge gun, our guide to loading and unloading a caulking gun covers that process. This one is specific to the sausage format.
How to Load a Sausage Caulking Gun: Step-by-Step
Step 1. Cut open the sealed end of the sausage pack
Before the pack goes anywhere near the gun, cut open the sealed end of the sausage pack with a utility knife. This cut is only to open the pack, not to shape the bead. Bead size and shape are controlled later by the nozzle tip.
Step 2. Open the barrel
Unscrew the front cap of the gun. This is what seals the enclosed barrel, and it needs to come off before anything can go inside.
Step 3. Free the plunger
Hold down the release lever on the trigger assembly. This disengages the ratchet mechanism so the plunger rod can move freely instead of only advancing forward.
Step 4. Retract the plunger rod fully
With the release lever held, pull the plunger rod all the way back. You’re clearing the full length of the barrel so there’s room for the pack to sit flush inside.
Step 5. Insert the pack into the barrel
Slide the prepared pack into the open end of the barrel, cut end facing out. It should seat all the way in, with no gap left at the base.
Step 6. Fit the nozzle into the front cap
Seat the nozzle into the front cap before putting the cap back on the gun. This is the piece that shapes your bead, so if you need to adjust bead size, trim the nozzle tip at an angle, the same way you would with a standard cartridge nozzle. Our guide to cutting a caulk tip covers angle and size in more detail.
In many sealant applications, operators treat the nozzle as a disposable or low-cost replacement part, especially when the material cures quickly or is difficult to clean.
Step 7. Tighten the cap back onto the barrel
Screw the front cap, with the nozzle now seated in it, back down onto the barrel over the cut end of the pack. This holds the pack and nozzle in place under pressure once you start dispensing. Check that the cap is fully seated. A cap that isn’t tightened all the way is the most common reason material backs up instead of coming out the front.
If your pack has a separate inner seal beneath the cut opening, rather than being open as soon as you cut it, puncture it with a stiff wire or the gun’s puncture rod before you start priming.
How to Use a Sausage Caulking Gun Once It’s Loaded
Prime it first: Squeeze the trigger in slow, steady strokes until sealant appears at the nozzle. Because a sausage pack holds considerably more material than a standard cartridge, it can take a few extra strokes before you see flow start, don’t mistake that lag for a loading problem and start second-guessing the cap.
Apply at a consistent angle and pace: The actual bead technique, gun angle, trigger pressure, movement speed, doesn’t change based on package format. If you want the full technique breakdown, our guide to using a caulk gun with silicone covers that in detail.
Take advantage of the higher capacity: This is really the point of switching to sausage format in the first place. A single pack runs longer than a cartridge before you need to stop and reload, which matters most on long, continuous joints where a mid-run interruption would show up as a visible seam.
Pausing before a pack is empty: If you need to stop before a pack runs out, release the pressure and retract the plunger. You can temporarily seal the cut end with foil or tape, then remove any cured material before reloading. In practice, this takes time, creates mess, and can affect the next bead if cured material remains, so many operators discard the partial pack and load a fresh one when they resume.
Using a Sausage Gun with Silicone Sealant
The loading and priming sequence above applies the same way regardless of what’s inside the pack, so how to use a silicone sausage gun comes down to the same steps as any other material. The one practical difference is that silicone is typically less viscous than polyurethane or hybrid sealants packaged in the same format, so it primes faster and requires less thrust to maintain a steady flow. If you’re switching between a high-viscosity material and silicone in the same gun, expect the trigger to feel noticeably lighter once silicone is loaded, that’s normal, not a sign that something’s seated wrong.
How to Clean a Sausage Caulking Gun
Cleaning a sausage gun involves one extra step that a standard cartridge gun doesn’t: the internal plunger needs attention, not just the exterior of the frame.
- Release the pressure and remove the pack as soon as you’re done for the day, rather than leaving cured material sitting in the barrel.
- Wipe down the front cap threads before residue has a chance to cure on them. Dried sealant here is the most common reason a front cap becomes difficult to remove the next time you load the gun.
- Check the plunger face for buildup. Material can transfer onto the plunger’s contact surface over repeated loads, and buildup here is what eventually throws off how flush the plunger seats against a new pack.
- Match the cleaning method to the sealant chemistry. Solvent-based materials need a compatible solvent cleaner. Moisture-cure materials like polyurethane should be cleared promptly, since they’ll continue curing on contact with air the longer they’re left. Follow the sealant manufacturer’s cleaning guidance rather than defaulting to whatever’s on hand.
- Store the barrel open, not sealed shut, if you’re setting the gun aside for an extended period. A closed, empty barrel with residual film inside is how a cap ends up seized on next time.
Common Sausage Gun Loading Mistakes to Avoid
Loading the plunger backward: Some plunger plates have a flat side and a contoured side, and inserting it facing the wrong way is one of the most common first-time errors with this format. If the plunger doesn’t seat flush against the pack, or the gun feels like it’s working harder than it should from the first stroke, check the plunger orientation before assuming anything else is wrong.
Skipping the priming stroke: Squeezing the trigger once and expecting sealant to appear instantly, then assuming the gun is faulty when it doesn’t, is a common early frustration. Given the extra material volume in a sausage pack compared to a cartridge, a short priming lag is normal, not a fault.
Forcing an oversized or damaged pack into the barrel: Inspect the pack before loading it. A pack that’s swollen, torn, or doesn’t match the gun’s rated barrel size can jam partway in or leak once under pressure.
Leaving the front cap loose: A cap that isn’t fully tightened is the single most common reason material backs up around the nozzle instead of extruding cleanly, covered above in the loading steps, but worth repeating here since it’s also the most common cleaning-related complaint.
Conclusion
The extra couple of steps in loading a sausage gun, opening the barrel, freeing and retracting the plunger, fitting the nozzle, are what let it hold more material with less waste than a standard cartridge. Once you’ve done it a couple of times, the sequence becomes second nature, and the higher capacity per load is what makes the format worth the switch in the first place, especially on long runs where reload frequency was slowing things down before.
Before you standardize on this format across a team or a job, it’s worth confirming three things against your actual workload: the pack size you’d typically run through in a day, the viscosity of the material you’re dispensing most often, and how many reloads per shift you’re trying to cut down on. If you’re still weighing whether a sausage caulking gun for foil-pack sealants is the right fit against those numbers, that’s worth settling before you commit a crew to the switch.
FAQs About Using a Sausage Caulking Gun
How do you load a sausage caulking gun?
Unscrew the front cap, hold the release lever and retract the plunger rod fully, insert the prepared pack into the barrel, fit the nozzle over the cut opening, and tighten the cap back down. Prime the gun with a few slow trigger strokes before you start applying.
How is using a sausage gun different from a standard caulk gun?
The core dispensing technique, angle, pressure, movement speed, is the same. The difference is in loading and capacity: a sausage gun holds more material per load, primes with a slightly longer lag due to that extra volume, and the barrel itself is fully enclosed rather than an open cradle.
How do you clean a sausage caulking gun?
Remove the pack and release pressure as soon as you’re done, wipe down the cap threads before residue cures, and check the plunger face for buildup. Match your cleaning method to the sealant chemistry, and store the barrel open rather than sealed shut between uses.
Is using a silicone sausage gun different from other sealants?
The loading and operating sequence is identical. Silicone typically runs less viscous than polyurethane or hybrid sealants in the same format, so it primes faster and needs less thrust to keep flowing steadily.
Can I reuse the nozzle on a sausage caulking gun?
Technically yes, if the nozzle is removable and the sealant inside has not cured. In practice, most operators replace it because cured material inside the nozzle can restrict flow and affect bead quality. If you pause with material still in the pack, release pressure and seal the cut end of the pack temporarily with foil or tape, then remove any cured material before reloading.
Why isn’t sealant coming out after I load the gun?
The most common causes are an undertightened front cap, a plunger that hasn’t been primed with enough trigger strokes yet, or a plunger plate seated backward. Check the cap first, since that’s the single most common fix.