Introduction
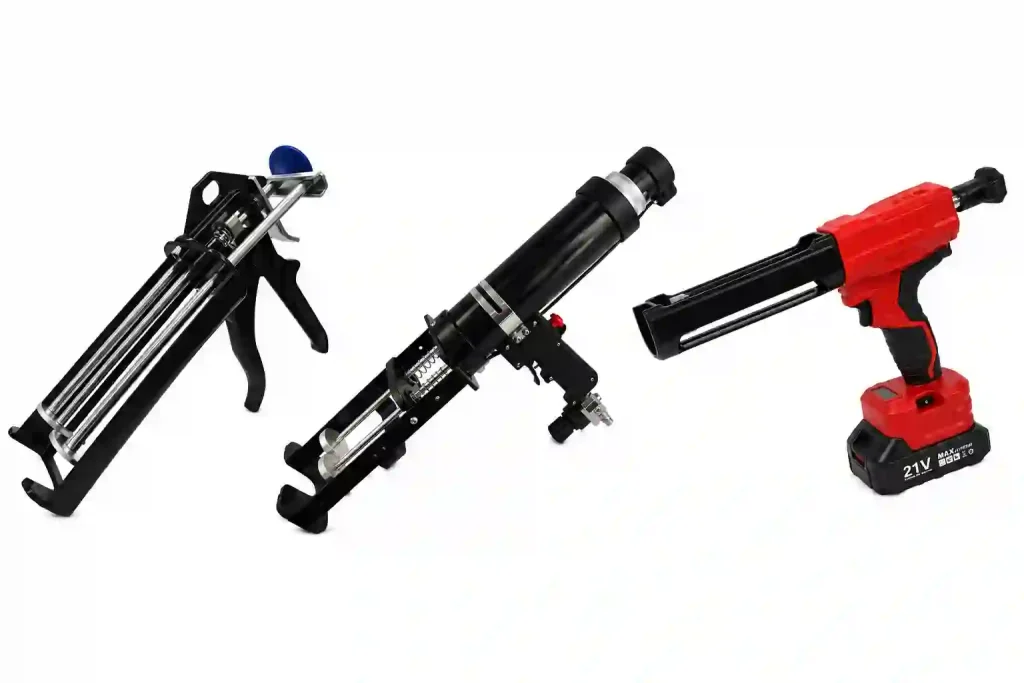
This guide helps you to learn how to load and unload a caulking gun, including prepping the tube, loading manual, pneumatic, and cordless caulk guns, and pulling the cartridge back out when the job is done. You can complete the installation by following this blog.
What You Need Before Loading
No matter which type of caulking gun you own, learn how to open a caulk tube is identical. Before the cartridge goes anywhere near the barrel, you need to do two things: cut the tip and pierce the inner seal.
Cut the Caulk Tip
Every caulk tube ships with a solid, uncut tip. You can refer to the blog about how to cut a suitable caulk tip.
Pierce the Inner Seal
Use the gun’s built-in puncture spike first. Many caulking guns include a thin metal wire or rod folded into the frame, usually stored alongside the barrel or near the front cradle. Unfold it, insert it through the cut nozzle opening, and push with steady pressure until you feel it punch through the membrane. Some membranes are thin foil and pop immediately; others are thicker plastic and require a firm shove.
No built-in spike? A long nail, a stiff piece of wire, or even a thin screwdriver will work. The tool just needs to be long enough to reach past the nozzle tip and firm enough not to buckle. Push it straight in, feel the resistance of the membrane, then push through it.
Pro Tip: Never pierce the seal before loading the tube into the gun. Do it after, so any accidental squeeze pressure doesn’t send caulk somewhere it doesn’t belong.
How to Load a Caulking Gun: Manual
A manual caulking gun loads through a four-step sequence: retract the plunger rod using the release tab, seat the nozzle in the front cradle, swing the tube flat into the barrel, then advance the plunger plate until it contacts the tube base.
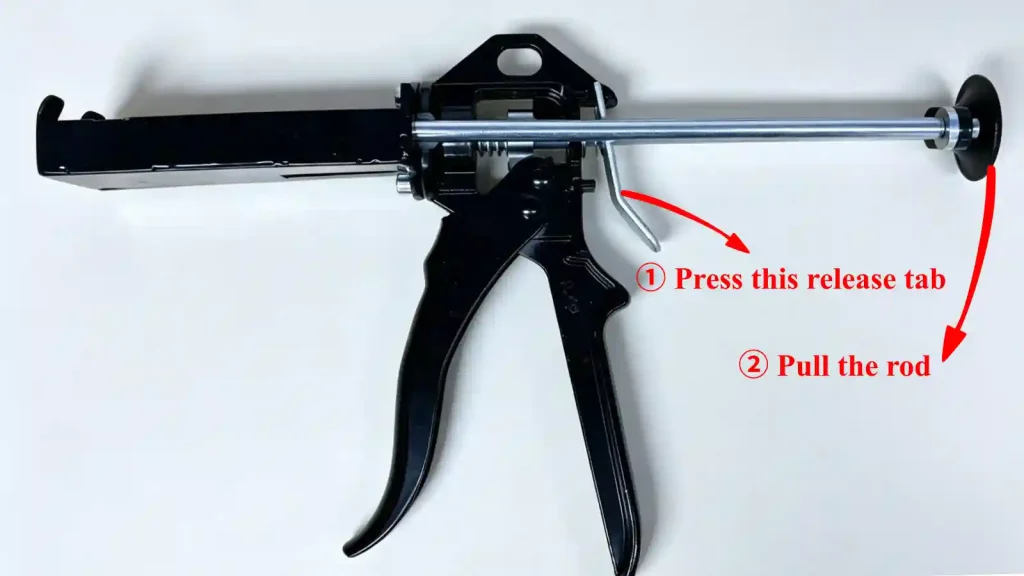
Press the release tab while pull rod.
Find the release tab, a small spring-loaded metal or plastic lever located just behind or below the trigger on most models. Press it firmly and hold it in while pulling the plunger rod backward until the plunger plate reaches the rear of the frame. You’ll feel the ratchet teeth disengage as you press the tab. If the rod won’t budge, you’re not pressing the tab far enough; it needs to be fully depressed to free the mechanism.
Insert the nozzle into the front cradle first.
Hold the gun at a slight downward tilt and feed the cut nozzle tip into the ring or lip at the front of the barrel. This front cradle is what locks the tube in place longitudinally.
Swing the tube body down into the barrel.
Once the nozzle is anchored in the front cradle, lower the body of the cartridge flat into the frame. On a standard open-frame gun, the flat piston plate at the base of the tube will be exposed at the rear. This is normal and correct.
Advance the plunger plateto contact the tube base.
Release the tab and squeeze the trigger in slow, controlled strokes until the plunger plate makes firm, flush contact with the rear piston plate of the tube. You’ll feel a slight increase in resistance when the plate seats properly. Stop at this point.
How to Load a Caulking Gun: Pneumatic
A pneumatic caulking gun loads differently from a manual model — instead of a plunger rod that retracts from the rear, the barrel opens from the front. The front cap and gasket are removed to insert the cartridge, then reassembled to seal the system before applying air pressure.
Remove the front cap and gasket
Start by unscrewing the front cap of the pneumatic gun. Carefully take out the gasket inside. Keep it safe, and you’ll reinstall it later.
Insert the rod
Take the plunger rod and place it into the gun barrel where the gasket was removed. Make sure it sits properly and aligns with the internal mechanism.
Push the rod forward
Manually push the rod forward through the barrel until it reaches the front, ensuring it will contact the base of the caulk tube once inserted. This sets up proper pressure for dispensing.
Insert the caulk tube
With the rod in place, remove the nozzle cap from your caulk tube. Place the tube nozzle-first into the front cradle and lower the cartridge flat into the barrel.
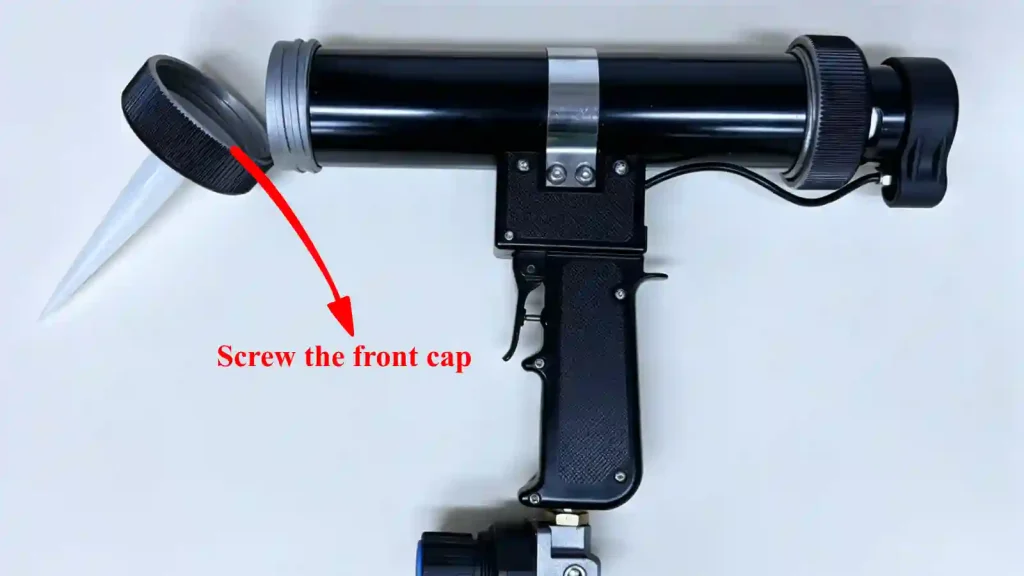
Reinstall the gasket and front cap
Finally, put the gasket back in place and screw the front cap onto the gun.
How to Load a Caulking Gun: Cordless
A cordless caulking gun retracts its plunger via a clutch button rather than a ratchet release tab, and the pull rod disengages the motor drive directly. Loading requires three steps: pull the rod back with the clutch held, drop the tube in, then release the clutch to re-engage the drive.
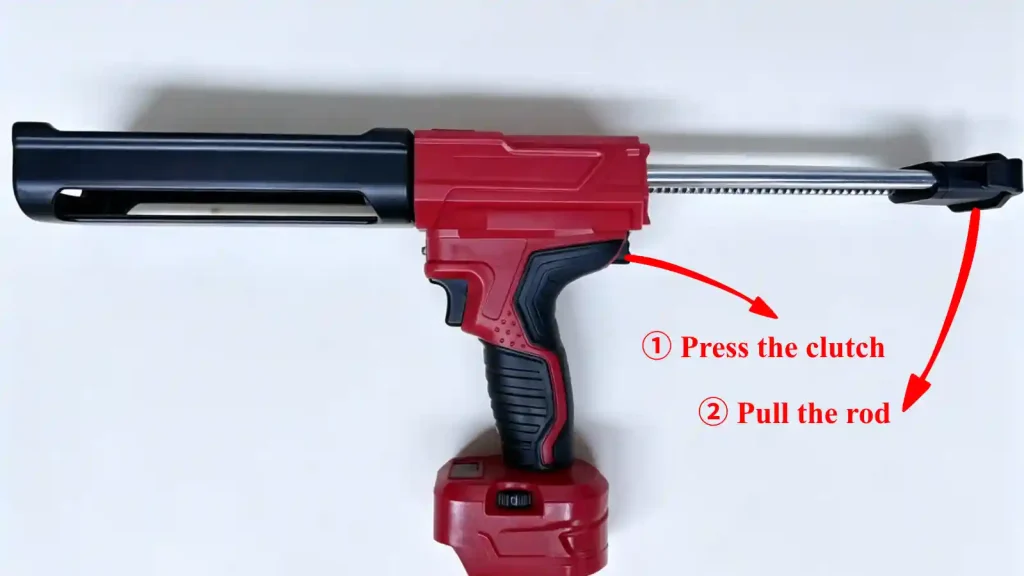
Pull the rod back manually
To retract the plunger on a cordless gun, press and hold the clutch (or release) button located near the trigger. While holding it, grip the pull rod firmly and pull it straight back toward the rear of the gun until the plunger plate clears the barrel. Pull smoothly and steadily rather than jerking.
Insert the caulk tube
With the plunger fully retracted, insert the tube nozzle-first into the front cradle, then lower the body into the barrel. The tube should sit flat with no gap between the nozzle and the front ring.
Release the clutch
Once the tube is in place, release the clutch button. This re-engages the motor drive, allowing you to advance the plunger using the trigger. A short squeeze of the trigger is usually enough to seat the plunger against the tube base, preparing the gun for smooth dispensing.
How to Unload a Caulking Gun
Unloading is just as important as loading correctly. The first thing to do when you stop applying is to release the drive pressure.
- On a manual gun, press the release tab. You’ll hear or feel a small click as the ratchet disengages. The rod is now free to move backward and the forward force on the tube is gone.
- On a pneumatic gun, first remove the end cap and the caulk tube. Press the trigger, and the plunger rod will be released and spring out. Retract and remove the rod, then place the gasket into the barrel of the gun and screw the front cap back on.
- On a cordless gun, press and hold the clutch button near the trigger to disengage the motor drive, then pull the rod back manually until the plunger plate clears the tube. With the pressure released, you can tilt the gun slightly and remove the caulk tube.
How to Remove the Tube From a Caulk Gun
Once pressure is relieved, removing the tube is straightforward for all three gun types. The sequence is the same whether the tube is empty or still has product left in it.
Tilt the gun nozzle-downward.
Gravity will help you. A slight downward tilt allows the tube to slide forward and out of the front cradle under its own weight, especially if there’s still sealant inside adding mass.
Grip the tube body and pull it forward and out.
Grasp the cartridge body instead of the nozzle, and pull it out through the front of the barrel. It should come free with minimal effort. If it resists, check that the nozzle tip hasn’t caught on the edge of the front cradle ring. A gentle side-to-side rocking motion while pulling usually frees it.
Cap the nozzle immediately.
As soon as the tube is out of the gun, seal the nozzle opening. Press the original cut-off tip piece back on, wrap the tip tightly with painter’s tape, or use a purpose-made silicone nozzle plug.
Conclusion
Learning how to load a caulking gun is one of the fundamental steps in industrial dispensing. From how to open a caulk tube and cutting the tip, to piercing the inner seal, retracting the plunger, and seating the tube properly, each step ensures optimal control. Following the right procedure also covers how to unload a caulking gun safely and efficiently, and how to remove a tube from a caulk gun when your project is complete.
Once you’ve mastered loading and unloading, understanding the actual use of the gun becomes much easier, as covered in our detailed guide on using a caulk gun.
FAQs about Loading a Caulk Gun
Can I load a half-used tube that has been stored with a capped nozzle?
Yes. Remove the cap and check that the nozzle opening is not blocked by dried sealant. Clear it with a nail or trim a small slice off the tip if needed, then load it the same way as a fresh tube. The inner seal is already open, so you can skip the piercing step.
How do I know the plunger is properly seated before I start applying?
Squeeze the trigger in slow strokes after inserting the tube. When the plunger plate makes full contact with the tube’s rear piston, you will feel firm, even resistance. If the resistance feels uneven or the tube shifts position, stop. The tip may not be fully seated in the front cradle. Reseat it before continuing.
Why put a hole in the bottom of a caulk tube?
You put a hole in the tube to pierce the inner seal and allow the sealant to flow. Inside the neck of virtually every caulk cartridge is a secondary membrane, a thin foil or plastic plate that protects the sealant during shipping and storage. Cutting the nozzle tip alone does not remove this barrier, so physically puncturing it is necessary.