
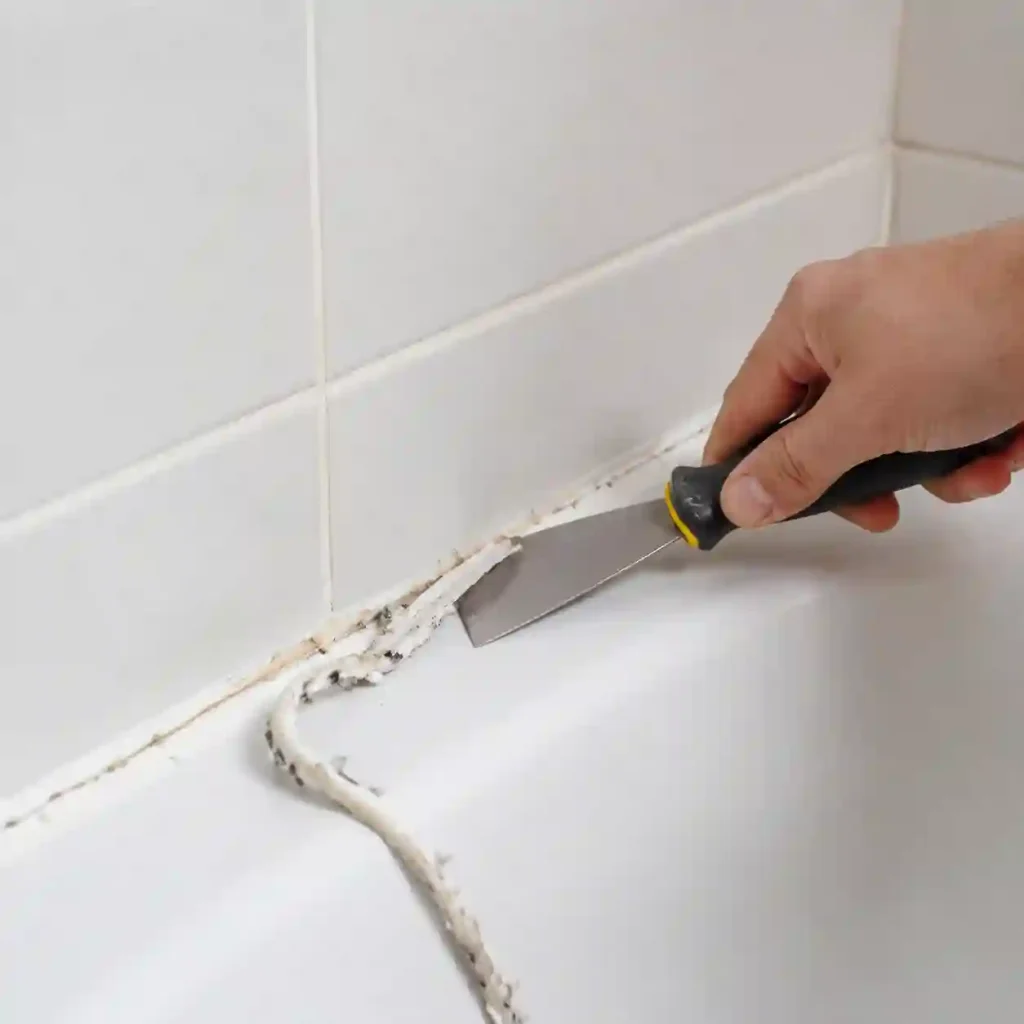
Quick answer: Score both edges of the caulk line, treat any visible mildew with a cleaner before you start cutting into it, then soften hardened caulk with a remover and work it loose with a plastic scraper on delicate tub materials or a metal one on tile and grout. Bathroom caulk usually needs a bit more patience than other spots, thanks to mold, tight corners, and finishes that scratch more easily than you’d think.
The Basic Method, Quick Recap
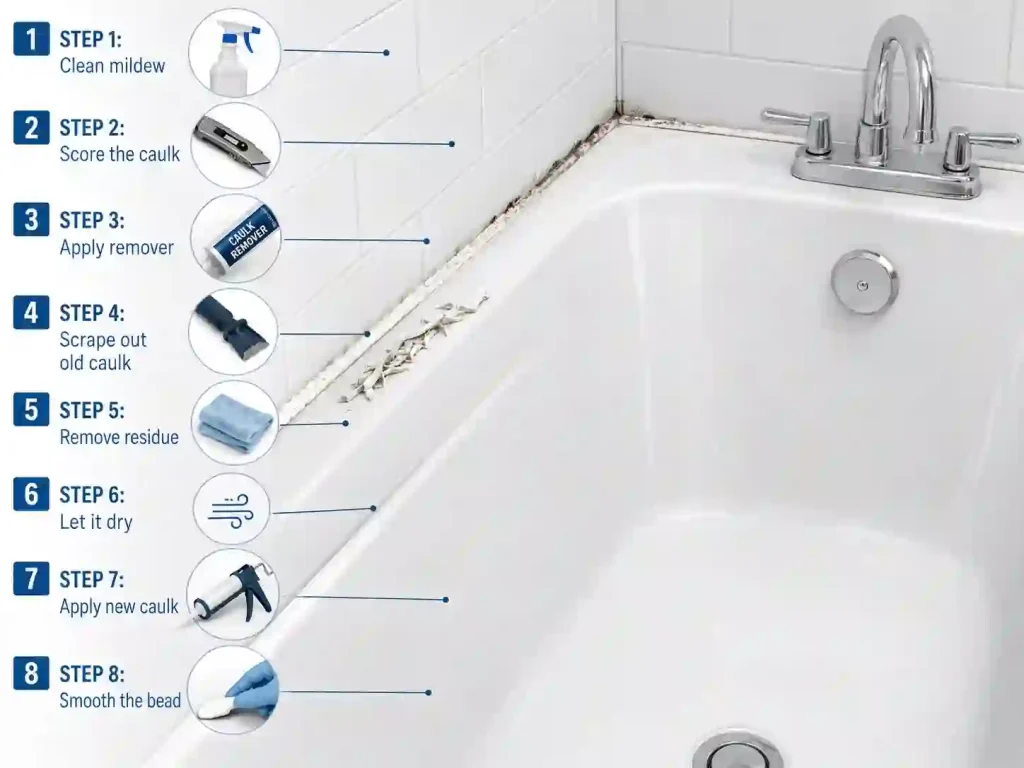
Removing caulk from a tub or shower starts with the same core steps as any other surface: score both edges with a utility knife, soften stubborn spots with a caulk remover, then scrape it loose and clean up the residue. If you haven’t done this before, our full guide to removing old caulk walks through that process in detail. What follows here is what’s actually different once you’re working around a tub or shower: material sensitivity, mold, tight corners, and a bit more patience than most other spots in the house need.
Know Your Tub Material Before You Start
Not every bathtub or surround reacts the same way to a blade or a solvent, and this is where a lot of the “I scratched my tub” stories start. Whether you’re dealing with silicone caulk or a latex/acrylic blend changes less about tool choice than the tub material itself does, but it’s worth knowing: Silicone usually leaves a slicker residue behind than latex or acrylic, so if you’re removing silicone caulk, plan on a dedicated silicone remover or a compatible solvent for the cleanup step.
- Acrylic and fiberglass tubs scratch and dull easily. Stick to plastic scrapers here, and test any solvent on a hidden spot, like behind where the tub meets the wall, before using it on the visible line. Acrylic in particular can soften or cloud with the wrong chemical remover.
- Porcelain-enameled steel or cast iron tubs are more forgiving of a metal scraper, but the enamel coating can still chip if you get aggressive with the blade angle. Keep the blade nearly flat against the surface rather than digging in at an angle.
- Tile and grout are usually tougher than the tub itself, but the grout lines are the weak point, a blade that slips off the caulk and catches a grout line can gouge it out. Go slow right at that transition.
If you’re not sure what your tub is made of, treat it like acrylic and start with the gentlest tools and lightest touch. It’s easy to work up to more aggressive tools; it’s much harder to undo a scratch.
Dealing With Mold, Mildew, and What’s Underneath
Bathroom caulk lines are where mold shows up first, and it’s worth handling that before you fully commit to scraping. It’s also worth being clear about what treating mold actually does and doesn’t accomplish here.
If there’s visible mold or mildew on the surface of the caulk, a diluted bleach solution (roughly 1 part bleach to 10 parts water) or a non-ammoniated bathroom cleaner can knock it down before you start cutting into it, this cuts down on what gets stirred up into the air while you’re working close to it. Never mix bleach with ammonia-based cleaners or any other bathroom chemicals. The combination can produce toxic fumes. Keep the area ventilated while you work, and rinse the surface before switching to any other cleaner. Rinse and let it dry before you pick up the utility knife.
That surface treatment is a safety and cleanliness step, not a repair. It only reduces what gets disturbed while you’re cutting and scraping, it doesn’t mean a caulk bead that’s already mold-stained, soft, or pulling away is fine to leave in place. That bead still needs to come out; the mold treatment just makes removing it a bit less unpleasant.
Once the old caulk is actually out, take a second to look at what’s behind it. If the wall material, drywall, backer board, or the area right at the tub edge, feels soft, swollen, or crumbly rather than solid, that’s usually a sign water has been getting in longer than the surface caulk line suggested. That’s worth addressing on its own before you seal anything back up, since caulking over a soft or damp spot won’t fix what’s underneath it.
Getting Into Corners, Around the Drain, and Behind Fixtures
The straight runs along a tub edge are the easy part. Corners, the base of the faucet, and around the drain flange are where a standard putty knife runs out of room to work.
A hook-style caulk removal tool, sometimes sold as a caulk hook or corner tool, is built for exactly this. Its narrow, angled tip can get into a corner or curve around a drain in a way a flat blade can’t. If you don’t have one, the tip of a small flathead screwdriver wrapped with a bit of tape (to avoid scratching) can do a rough version of the same job in a pinch. Go slow in these spots, tight corners are also where it’s easiest to nick a finish because you can’t see the blade angle as clearly as you can on a flat run.
Planning for a Full Bathroom Job
A single tub or shower usually has more than one caulk line: where the tub meets the wall, where it meets the floor, around the base of the faucet, sometimes along a shower door track or threshold. It’s easy to do the main visible line and miss one of these, only to notice it later.
Before you start, walk the whole space and mark or note every joint that needs attention. It’s a lot easier to budget your time, and your caulk remover, when you know upfront it’s four or five joints and not just the one obvious line.
Common Mistakes to Avoid
- Using a dull blade. A dull edge tears through caulk instead of slicing it, which drags on the surface underneath far more than a sharp one would.
- Pulling aggressively instead of working in light passes. One hard yank is more likely to gouge tile or chip enamel than several patient, shallow passes.
- Leaving a thin residue layer behind. It’s tempting to call it done once the visible caulk is gone, but a leftover film is exactly why new caulk peels early in bathrooms.
- Caulking over a joint that’s still damp or has mildew underneath. Bathroom humidity makes this an easy mistake to repeat if you rush the drying step.
- Reaching for a strong solvent on acrylic or fiberglass without testing it first. What’s safe on tile or porcelain isn’t always safe on a softer tub material.
Ready for a Fresh Bead?
Once the joints are clean, dry, and free of any mold or damage underneath, you’re ready to reseal with a mold-resistant bathroom caulk. In a bathroom, give the joint extra drying time if the area was damp, recently cleaned, or close to a water-damaged spot. For technique on laying down a clean, even bead in a space like this, our guide to applying silicone with a caulk gun covers that, and if you’re deciding what to reach for, take a look at our caulking gun options for a clean bathroom bead.
FAQs About Removing Caulk from a Tub or Shower
How do you remove caulk from a shower without damaging the tub?
Start with a plastic scraper rather than metal, especially on acrylic or fiberglass, and test any solvent on a hidden spot first. Score the edges with a utility knife before prying, and work in light, patient passes instead of one aggressive scrape, that’s what usually causes scratches or chips.
What’s the best way to remove caulk from a shower?
Treat any visible mildew with a cleaner first, then soften the hardened caulk itself with a caulk remover, score both edges, and work it loose with a scraper matched to your tub material. Clean up the residue and check the area behind the caulk for any softness or damage before resealing.
How do you remove old caulk from a tub without scratching it?
Match your tool to the material: plastic scrapers for acrylic or fiberglass, and a lighter touch with metal tools on porcelain or cast iron. Keep the blade angle as flat as possible against the surface, and go slowly through corners, where it’s easiest to lose track of the blade angle and nick a finish.
How do you remove caulk from tight corners or around a drain?
A hook-style caulk removal tool is built for this, its narrow, angled tip reaches into corners and curves that a flat putty knife can’t. A taped screwdriver tip can work as a rough substitute if you don’t have one on hand.
Do I need to treat mold before removing bathroom caulk?
If there’s visible mold or mildew on the caulk surface, treating it first with a diluted bleach solution or bathroom cleaner cuts down on what gets disturbed into the air while you’re cutting and scraping. Never mix bleach with ammonia-based cleaners or other bathroom chemicals, and keep the area ventilated. Treating the surface doesn’t mean you can leave mold-stained caulk in place, though, it still needs to come out.
How do I know if there’s water damage behind the caulk?
Once the old caulk is out, check the wall material right behind it. If it feels soft, swollen, or crumbles rather than staying solid, that usually means water has been getting past the caulk line for a while. That’s worth addressing before you reseal, since new caulk won’t fix damage that’s already underneath it.