
When foil-pack sealant pulses, leaks around the cap, or leaves an uneven bead, the cause may be pack fit, priming, nozzle resistance, or drive control. Use this checklist to isolate the problem before changing the gun or material.
What Uneven Foil-Pack Dispensing Looks Like
Before you adjust the gun, describe the symptom you can actually see. A bead that changes width, flow that starts and stops, material escaping around the front cap, or a long delay before the first bead may have different causes. Record when the problem occurs: at startup, after a pause, as the pack empties, or throughout the run.
- Pulsing or interrupted flow: the bead starts and stops, or its width changes even though you keep the same travel speed.
- Leakage around the front cap: sealant escapes at the connection instead of flowing cleanly through the nozzle.
- A delayed or undersized first bead: the pack may not be fully opened, the system may not be primed, or the piston may not be seated correctly.
- Changing bead size during the run: material temperature, nozzle restriction, drive conditions, or operator technique may be changing.
- Flow slows as the pack empties: the sleeve may be bunching or collapsing unevenly, or the piston may not be advancing as intended.
Check the Pack, Barrel, and Piston Fit
Start with the packaging, not with more trigger force. Confirm that the foil pack’s capacity, diameter, length, and end construction match the gun barrel and piston. A capacity label alone does not prove compatibility. Inspect the sleeve for tears, swelling, damaged seals, or hardened material. If the pack folds, bunches, or cannot sit fully inside the barrel, stop and correct the fit rather than forcing the cap closed.
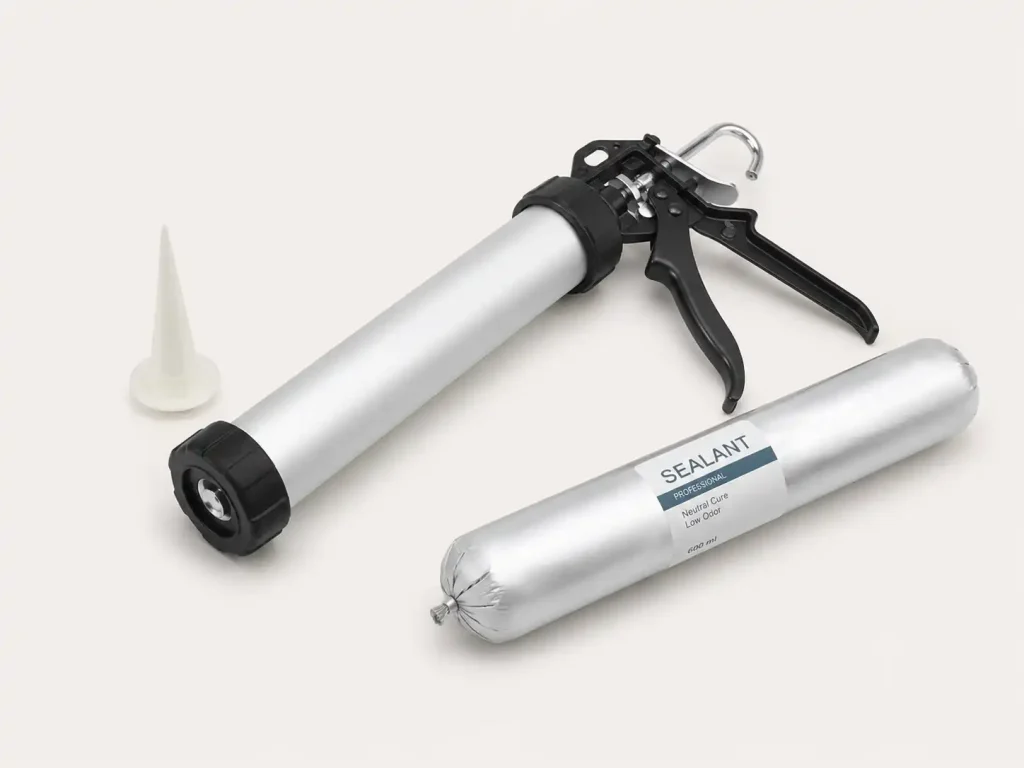
Check that the piston moves freely and contacts the pack as the gun manufacturer intends. Make sure the front cap is fully seated, the nozzle is held securely, and the threads and seals are undamaged. If you are comparing tool formats, review the sausage caulking gun configurations before selecting a model for your pack size and work pattern.
Load and Prime the Pack Consistently
Follow the loading sequence specified for your gun. In general, release the drive, retract the plunger, prepare the pack as directed by the sealant manufacturer, position it correctly in the barrel, and secure the front cap and nozzle. Do not cut or puncture the pack in a way that is not approved for that product.
After assembly, prime the gun onto a designated waste surface using steady trigger strokes until the flow is continuous. A short delay at startup does not automatically mean the gun is defective; the amount of priming required depends on the tool, pack, and material. For the full loading sequence, see How to Load and Use a Sausage Caulking Gun.
Check the Nozzle and Material Flow Path
Inspect the nozzle opening for cured sealant, debris, or an opening that is too small for the required bead. Match the outlet to the joint dimensions and the sealant manufacturer’s application instructions. A narrow or partially blocked outlet increases flow resistance. Replace a blocked disposable nozzle rather than trying to force material through it.
Material viscosity also affects the force needed to dispense. If the sealant is too cold or has moved outside its specified application range, flow may become difficult even when the gun is working normally. Keep the material within the handling and temperature limits stated by its manufacturer; do not heat it or alter its condition unless the instructions permit it.
Keep Drive Conditions Consistent
With a manual gun, keep your trigger pressure, gun angle, and travel speed as consistent as the job allows. If you change operators, record the intended bead size and application technique so a change in handling is not mistaken for an equipment fault.
With a pneumatic gun, check the regulated air supply, hose, fittings, and regulator setting separately. Use only the operating range approved for your specific tool. Increasing air pressure to overcome a blocked nozzle, damaged pack, or incompatible setup can damage the pack or applicator and may make the fault harder to identify.
Plan Pauses and Pack Changes
Before a planned pause, release pressure and follow the storage instructions for your gun and sealant. Do not leave reactive material in a nozzle beyond the material’s permitted working interval. On a long joint, plan pack changes at a practical stopping point rather than waiting until the material runs out in the middle of a visible bead.
Record the pack type, nozzle, material temperature, time of the interruption, and any abnormal leakage or pulsing. These notes help you compare setups and identify whether the problem is tied to the material, the pack, the nozzle, or the drive system.
A Quick Pre-Shift Checklist
- Confirm that the pack dimensions and format match the barrel and piston.
- Check the pack for damage and confirm that the material is within its stated use conditions.
- Make sure the piston, front cap, seals, and nozzle are seated correctly.
- Prime onto a waste surface until the flow is stable.
- Confirm that the nozzle is clear and the drive or air supply is within the tool’s rating.
- Check the first production bead and watch for changes after pauses or pack changes.
FAQs About Sausage Gun Dispensing
Can Any 600 ml Foil Pack Fit a 600 ml Sausage Gun?
No. The nominal capacity is only one part of the fit. You also need to confirm the pack diameter, length, end construction, barrel dimensions, piston design, and front-cap arrangement. Check the gun and pack specifications before loading.
Why Does Sealant Pulse or Stop During Dispensing?
Pulsing can result from a restricted nozzle, a pack that is not seated or collapsing properly, material that is too viscous for the setup, inconsistent manual strokes, or an unstable pneumatic supply. Check these variables one at a time before changing the gun.
Why Does Sealant Leak Around the Front Cap?
The cap may not be fully seated, the pack may be damaged or incorrectly opened, or the nozzle and retaining parts may not be fitted correctly. Release pressure before inspecting the assembly, then follow the gun manufacturer’s instructions to reseat or replace damaged parts.
Why Does Sealant Keep Flowing After You Release the Trigger?
Residual pressure, sealant viscosity, and the gun’s pressure-release or exhaust design can all affect cutoff. Check the tool’s release behavior and the material instructions. Continued flow does not always mean the gun is defective.
Is a Pneumatic Gun Always Better for High-Viscosity Sealant?
Not automatically. Your choice depends on the sealant’s resistance, required bead length, production frequency, available air supply, tool rating, and operator access. Test the specific material with the proposed gun before standardizing the setup.
Final Thoughts
Reliable foil-pack dispensing starts with a matched pack, barrel, piston, and nozzle, followed by consistent priming and controlled drive conditions. When you evaluate a sausage caulking gun, compare the exact pack dimensions, material resistance, work cycle, and drive requirements—not capacity alone. Btektech manufactures adhesive dispensing systems and components for industrial applications. Visit Btektech to review the product range or discuss a configuration using your pack and sealant details.