
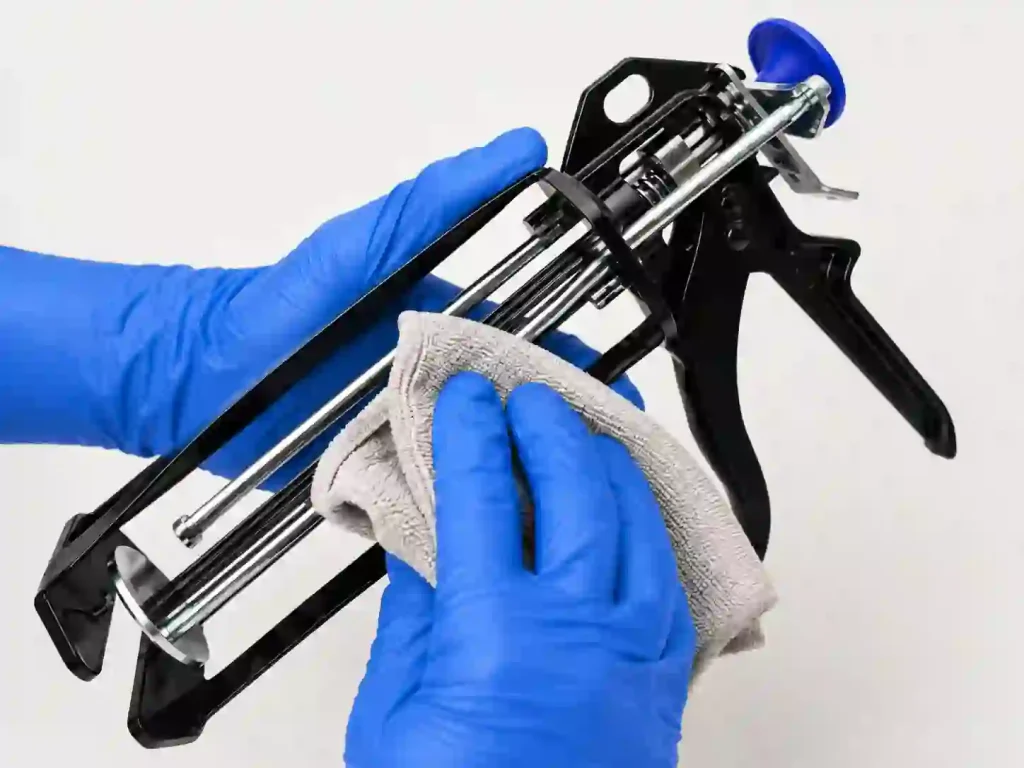
You’ve just finished a run, and now there’s a mixing nozzle full of curing epoxy, some residue on the frame, and half a cartridge left over. This guide walks through what you actually need to clean, what you’re better off just replacing, and how to keep the next cartridge from clogging on you. If you’re looking for how to load the gun or set it up in the first place, that part’s covered elsewhere, this picks up right after you’ve pulled the trigger for the last time.
What Parts of an Epoxy Gun Can Actually Be Cleaned?
Not every part of an epoxy gun deserves the same treatment once you’re done dispensing. Draw that line early, and you’ll save yourself a lot of wasted effort, plus a couple of common mistakes.
Clean it and keep using it: the gun frame, the plunger or push plate, the cartridge holder, and the trigger mechanism. None of these touch mixed, reacting material directly, so wiping them down now and then is really all you need to keep them working indefinitely. Just make sure the holder and plunger actually fit the cartridge size you’re running in the first place, that’s a purchase-time question, not a cleaning one, and it’s worth checking your gun’s cartridge specifications if a cartridge never quite seats right no matter how clean you get things.
Treat it as a consumable, not something to save: the static mixing nozzle. Once epoxy passes through it, the two components are already reacting inside the mixing chamber. Even if you rinse it right away, you’re not likely to clear the internal mixing elements completely, and whatever’s left behind is exactly what causes clogging, contamination, or uneven output next time. You’ll spend less time and material treating it as one-and-done than trying to rescue it.
It depends on whether it’s cured: any epoxy residue sitting on the frame or the cartridge itself. Catch it while it’s still uncured and it wipes away easily. Let it cure, and a quick wipe usually won’t touch it, more on that next.
Uncured vs. Cured Epoxy: Why Timing Matters
The single biggest factor in how you clean an epoxy gun is timing: whether the epoxy on it has actually cured yet.
Uncured epoxy is still workable. A cloth and a solvent compatible with that specific epoxy chemistry will usually clear it without much fuss, as long as you get to it before it sets. Check the material’s technical data sheet for the recommended solvent instead of grabbing whatever’s on hand, not every epoxy responds the same way to acetone or isopropyl alcohol.
Cured epoxy is a different problem. Once it’s hardened, it typically won’t dissolve with a quick wipe or a short soak, and if you go in expecting a solvent to clear it completely, you’ll usually be disappointed. If it’s cured onto the frame or cartridge holder, you’re generally better off with careful mechanical removal, a plastic scraper rather than anything that could gouge the surface, than relying on solvent alone. If it’s cured inside the mixing nozzle, your practical answer is almost always to replace the nozzle rather than fight it.
Step 1: Release Pressure and Remove the Cartridge
Release the trigger pressure and retract the plunger before you do anything else. The epoxy-specific part of cleanup really starts once the cartridge is out and you’re deciding what to do with the mixing nozzle still attached to it, that’s the next step.
Step 2: Check Whether the Static Mixing Nozzle Should Be Replaced
This is the step most cleaning guides get wrong, and it’s the one that matters most once you’re running a two-component system.
If there’s epoxy sitting in the nozzle that hasn’t fully passed through and reacted yet, and you’re planning to pick dispensing back up shortly, you can probably still use it. But once material’s been sitting in the mixing chamber long enough to approach the epoxy’s working time, or you’re pausing for a while, you’re better off putting on a fresh nozzle before you continue. Force a partially cured or clogged nozzle to keep dispensing, and you’ll end up with uneven mixing, more resistance, or material backing up instead of extruding cleanly.
If you want a closer look at what’s actually happening inside a mixing nozzle once you push it past this point, our breakdown of common mixing nozzle mistakes goes into the specific failure patterns in more detail than makes sense to repeat here.
Step 3: Wipe Down the Frame, Cartridge Holder, and Plunger
These are the parts genuinely worth your cleaning time. Wipe away uncured residue before it has a chance to cure onto the surface, and pay particular attention to the cartridge holder, dried epoxy here is exactly what makes your next cartridge hard to seat. Check the plunger face for buildup too; material that’s transferred onto it over repeated cycles is what eventually throws off how flush it seats against a fresh cartridge.
Don’t soak the whole gun in solvent unless the manufacturer specifically says the frame can handle it. Leave an aggressive solvent sitting on plastic housings or rubber seals, and you can degrade them faster than the epoxy residue would ever have caused problems on its own.
Step 4: Maintain the Trigger and Moving Parts
Check that the trigger moves smoothly and that both sides of the plunger mechanism advance evenly, an uneven push is often your first sign of a worn part or contamination inside the drive mechanism, not necessarily anything wrong with the material itself. A little lubrication on the moving parts, if your manufacturer’s guidance allows it, keeps the mechanism from stiffening up between uses.
If you’re seeing this kind of wear regularly and you’re due for a replacement tool anyway, it’s worth confirming you’re matched to a dispensing gun sized to your cartridge ratio in the first place, a mismatch there tends to show up as exactly this kind of premature wear.
Step 5: Check the Gun Before Storage
Before you put the gun away, confirm it’s mechanically ready for next time, without wasting a new mixing nozzle just to prove it. Check that both sides of the plunger advance in sync, that the cartridge outlets are clear of residue, and that the frame and holder are clean and dry.
Don’t fit a fresh static mixing nozzle and run material through it just to reassure yourself before storing the gun. All you’ve done is start the working-time clock on a nozzle you haven’t actually used for anything. Fit a new mixer and purge it when you’re actually ready to dispense again, not before.
Preventing Clogs Before They Happen
Most clogging problems trace back to a handful of avoidable habits, not a faulty gun.
- Purge before you rely on the output. A short purge clears out anything that’s already started reacting near the tip before it affects your actual application.
- Don’t leave mixed material sitting in the nozzle indefinitely. The mixing chamber is where the reaction is most concentrated, and time is the one variable working against you there.
- Replace the nozzle after a long pause, rather than assuming it’s fine just because it looked fine last time you checked.
- Treat sudden resistance as a signal to stop, not push through. If the gun’s suddenly harder to squeeze than usual, it’s usually telling you something’s started curing where it shouldn’t.
For the complete dispensing sequence, including how to set up and purge the gun before you ever get to this stage, our guide to proper epoxy gun setup and purging steps covers that separately.
Cleaning vs. Replacing: A Quick Reference
| Part | Clean When | Replace When |
| Gun frame | Uncured residue present; wipe before it cures | Cracked, warped, or damaged housing |
| Plunger / push plate | Residue buildup on the contact face | Worn, bent, or no longer seating flush |
| Cartridge holder | Uncured residue around the seat | Damaged threads or seat won’t hold cartridge securely |
| Trigger and moving parts | Light residue; lubricate if manufacturer allows | Mechanism sticks, skips, or drives unevenly |
| Static mixing nozzle | Rarely, generally not recommended for reuse | Material has entered the mixer, working time has passed, resistance has increased, or you’re resuming after a long pause |
| Epoxy cartridge outlets / exterior | Uncured residue present around the outlet or exterior | Past shelf life, outlet residue has cured, or contents show separation or contamination |
Conclusion
Cleaning an epoxy gun properly comes down to a fairly short list: keep the frame, plunger, cartridge holder, and trigger mechanism free of residue and properly maintained, and treat the static mixing nozzle as a consumable rather than something to rescue. Get that distinction right, and you’ll avoid most clogging, uneven output, and hard-to-squeeze problems people run into.
If you’re replacing nozzles often enough that it’s becoming a real cost, or your current setup feels mismatched to the cartridge ratio you’re running, it’s worth confirming your two-component dispensing gun for your cartridge ratio and static mixing nozzle specifications for your epoxy system actually fit your material and working time before you assume the maintenance routine is the problem.
FAQs About Cleaning an Epoxy Gun
Can you clean and reuse a static mixing nozzle?
Not reliably, and not as a habit. Once epoxy passes through the mixing chamber, the two components are already reacting, and even a quick rinse won’t clear the internal mixing elements completely. The one exception is a very short pause where you’re picking back up well within the epoxy’s working time, in that case the nozzle may still be usable. Once you’re approaching or past that window, replace it rather than try to save it; purging a fresh nozzle takes far less of your time than troubleshooting a partially cured one.
Why does epoxy harden inside the mixing nozzle, and what should I do about it?
It happens when mixed material sits in the mixing chamber longer than the epoxy’s working time, whether that’s from an extended pause or just letting the gun sit loaded. Once it’s hardened in there, don’t try to clear it and don’t force the gun to keep dispensing through it, both usually just add resistance and risk uneven mixing. Replace the nozzle instead. If your gun’s suddenly harder to squeeze than usual, this is almost always the reason.
Can acetone clean epoxy from an epoxy gun?
It depends on whether the epoxy’s cured and what it’s sitting on. You can often wipe away uncured residue with a solvent compatible with that specific epoxy, check the material’s data sheet rather than assuming acetone works across the board. Cured epoxy generally won’t respond reliably to a solvent wipe, and leaving solvent on plastic housings or seals too long can damage them too.
How do I prevent an epoxy gun from clogging?
Purge the nozzle before you rely on the output, and don’t let mixed material sit in the mixing chamber past its working time. Replace the nozzle after any extended pause rather than assuming it’s still fine. Most clogging comes down to timing, catch it before the material reacts and you avoid the problem entirely.
Should I remove the cartridge after every use?
It depends on the material and how long you expect the gun to sit idle. For a short break, you probably don’t need to. For anything longer, release the pressure, clean residue from the outlet, and store the cartridge according to the manufacturer’s guidance.
Which parts of an epoxy gun need regular maintenance?
The frame, plunger, cartridge holder, and trigger mechanism all benefit from regular cleaning and the occasional bit of lubrication. The static mixing nozzle is the exception, you’ll generally replace it rather than maintain it.